Automate and monitor linux backups
The second most important resources in a homelab other than the lab itself are backups. It is critical not only to take backups but verify that you can restore your backups. I have settled for taking images of the entire host operating system but have run into challenges trying to mount disk images that approach 1 TB or more. I decided to slim down my backups for certain servers. For most servers, I just need config files and persistent data such as databases. Let’s look at a simple script to backup and archive files and then save them to a central data store.
In my homelab, I have a suitable NFS server that can be used to store backup images. For more information on how to set up an NFS server see a previous post on the subject. This system can store 12 TB of files and I use rsync to backup the entire NAS system to an encrypted USB hard drive. I suggest periodically saving backups to an encrypted USB drive and don’t leave it mounted to your servers. If you ever get hit by ransomware, you can use the “offline” backup to restore your data.
Backup script
Here is a backup script that can be tweaked to archive whatever directory you want. In this example I am backing up the entire /home/ directory for the user on the associated system.
#!/usr/bin/env bash
set -e

DEST='/mnt/nfs/backup'
SYNC='/home/user'

ARCHIVE="backup-pi-$(date +'%F').tar.gz"
CMD='tar -cpzf'

if [[ ! -d $DEST ]];
then
    mkdir -p $DEST
fi

NFS="mount -t nfs nas.server:/backup/share/path $DEST"

$NFS

#Backup archive
$CMD $DEST/$ARCHIVE $SYNC

#Delete old files
#find $DEST -mtime +14 -delete

umount $DEST

echo "backup finished"
This script is configurable through the variables.
- DEST: is where we mount the NFS share
- SYNC: is the directory to backup
- ARCHIVE: will create determine the file name based on the current date
- CMD: is the command to create a compressed archive
- NFS: is the mount command for the NFS share
You will want to modify the $SYNC variable to match the directory you want to backup.
You will want to modify $NFS to match your NFS server and NFS share
Monitor cron jobs with healthchecks.io
Next I’m going to configure a cloud software service to monitor backup cron jobs. Create a free account with any email address at https://healthchecks.io/
Once you create an account, create a new check and copy the URL they generate for you under the section “How to Ping”.
All you have to do is update your cron job command to send an HTTP request to Healthchecks.io after completing the job. This site can send notifications to email and many messaging platforms such as slack and discord.
Set up cron job
In linux you can schedule scripts with the crontab utility. On my debian based servers, this utility is already installed. On other distributions of linux, you may need to install a package to provide the crontab utility.
With the cron supporting packages installed, run crontab -e as the root user to ensure all files are backed up and the script can mount NFS storage.
# crontab format
#* * * * *  command_to_execute
#- - - - -
#| | | | |
#| | | | +- day of week (0 - 7) (where sunday is 0 and 7)
#| | | +--- month (1 - 12)
#| | +----- day (1 - 31)
#| +------- hour (0 - 23)
#+--------- minute (0 - 59)

0 1 * * 5 /usr/local/sbin/backup-pi.sh && curl -fsS --retry 5 -o /dev/null https://url-from-healthcheck-profile
This will execute the backup script at 0100 Every Friday.
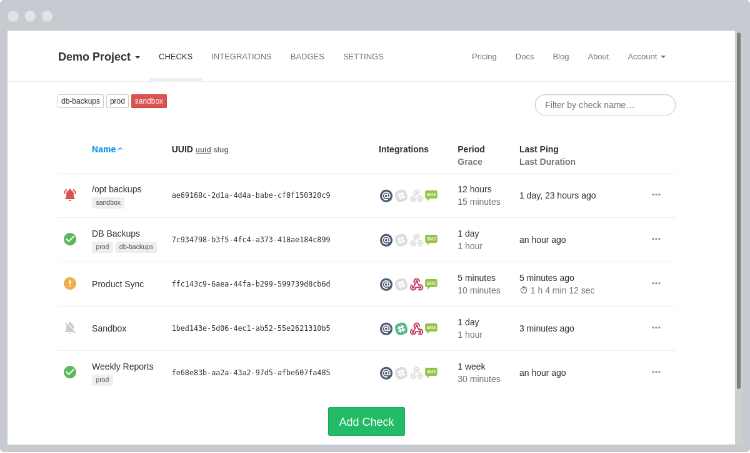
Once you configure some cron jobs, your dashboard on healthchecks.io should look like this:
In a future post I may explore the self-hosted version of this application but I try to avoid hosting database engines in the cloud.