Modern Command Line Tools
If you spend a lot of time in a terminal, GNU coreutils are probably part of your muscle memory. Commands like ls, cp, mv, rm, and cat have been around for a very long time. They are found on small embedded computers and the BSD version lives on all macOS systems. The reason they have been around so long and so widely used is for their reliability.
Still, many people do not spend a lot of time in a terminal especially now with so many apps available to make interacting with a computer easier with buttons and interfaces. In 2025 and 2026 I see a resurgence of terminal based workflows as many people rush to try out new agentic AI coding tools that were first released as terminal based applications. By far the most popular in 2026 is claude code.
This post is a practical guide to working in the terminal today while staying grounded in the Unix philosophy. Coreutils remain the foundation. Zsh is an enhancement over the more common Bash shell. Modern CLI tools improve day‑to‑day ergonomics without compromising portability or stability.
My goal for using these tools is to improve my productivity and I hope you find some of them useful whether you are just getting started working in a terminal or you have been using one for decades.
The Shell as the Platform: Zsh
Before talking about individual tools, it helps to be explicit about the shell itself.
Modern terminal workflows increasingly assume Zsh. Not because it is trendy, but because it has better defaults, smarter completion, and a mature ecosystem.
Example:
zsh --versionOne distinction matters throughout this article:
Use coreutils in scripts and automation. They are stable, ubiquitous, and boring in the best way.
Use modern CLI tools at the keyboard. They are faster to read, easier to navigate, and optimized for interactive work.
Mixing those two worlds is how you end up with brittle scripts or a frustrating terminal.
I cover Zsh plugins, completions, and prompt theming in more detail in a previous post, but none of those plugins are required to take advantage of Zsh.
What Are GNU Coreutils?
GNU coreutils are a collection of essential user-space programs that provide basic file, text, and system manipulation capabilities. They are written in C, depend on almost nothing, and are designed to be stable for decades.
You may already know them:
| Category | Examples |
|---|---|
| File operations | ls, cp, mv, rm, ln, stat |
| Permissions | chmod, chown, chgrp, umask |
| Text | cat, tac, nl, wc, head, tail |
| Disk & system | df, du, uname, id, whoami |
| Control & glue | xargs, watch, timeout, yes |
These tools are:
- Predictable
- Scriptable
- Pipe-friendly
- Universally available
Example:
ls -lahThey are not interactive or pretty. But that’s intentional.
The Unix Philosophy
Coreutils exist because the Unix philosophy works.
Small tools that do one thing well, communicate through text, and compose cleanly are still the most reliable way to build systems. That model survives containers, remote servers, CI pipelines, and minimal rescue environments.
Where the model shows its age is not capability, but ergonomics. Long pipelines are hard to read. Output is optimized for machines, not humans. Performance depends heavily on how carefully you write the command.
Modern CLI tools do not abandon this philosophy. They refine it for people working in a terminal, while leaving the underlying model intact.
Modern Replacements for Classic Commands
These tools don’t replace coreutils in scripts. They replace them at the keyboard.
Everything below is optional. Use whatever looks useful; skip the rest.
Text Search: ripgrep Instead of Recursive grep
Baseline: grep
grep -R "TODO" .This works everywhere, but it:
- Walks directories serially
- Ignores
.gitignore - Is easy to slow down accidentally
Why it exists
grep -R works, but it is:
- Slow on large trees
- Blind to
.gitignore - Easy to misuse
ripgrep (rg) is a modern recursive search tool that:
- Is fast
- Respects
.gitignoreby default - Uses parallelism
- Handles Unicode correctly
Out of everything on this post, I use this software the most.
rg "TODO"Installation
macOS:
brew install ripgrepUbuntu:
sudo apt install ripgrepFedora:
sudo dnf install ripgrepFile search: fd Instead of find
Baseline: find
find . -type f -name "*config*"Powerful, but brittle and hard to read for interactive use.
Why it exists
find is incredibly capable, but most interactive searches end up being longer than they need to be, and small syntax mistakes can produce surprising results.
fd is designed for interactive use and quick recall:
- Sensible defaults
- Cleaner syntax
- Fast traversal (written in Rust)
- Respects
.gitignoreby default
This is my number 2 pick behind rg. I use this all the time to explore my company’s massive codebases.
fd configSome common patterns read nicely:
# Only search for files with a given extension
fd -e yaml

# Include hidden files/directories when you need them
fd -H config
Installation
macOS:
brew install fdUbuntu:
sudo apt install fd-findFedora:
sudo dnf install fd(On Debian/Ubuntu, the binary may be fdfind.)
List files with eza
Baseline: ls
ls -lah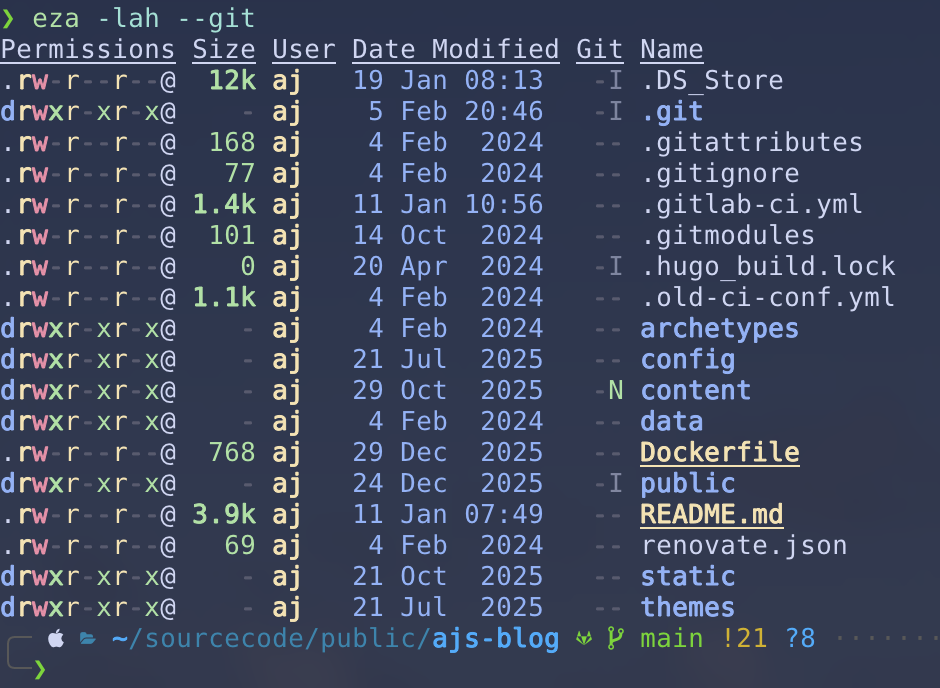
Why it exists
ls output is stable and script-friendly, but the flags are easy to forget and the default output is not optimized for scanning. In practice, people want “a good default listing” plus a couple of common add-ons (git status, a tree view, timestamps).
Modern alternative:
eza -lah --gitAdds:
- Git status
- Icons (with Nerd Fonts)
- Better defaults
Tree views are also built-in:
eza --tree -L 2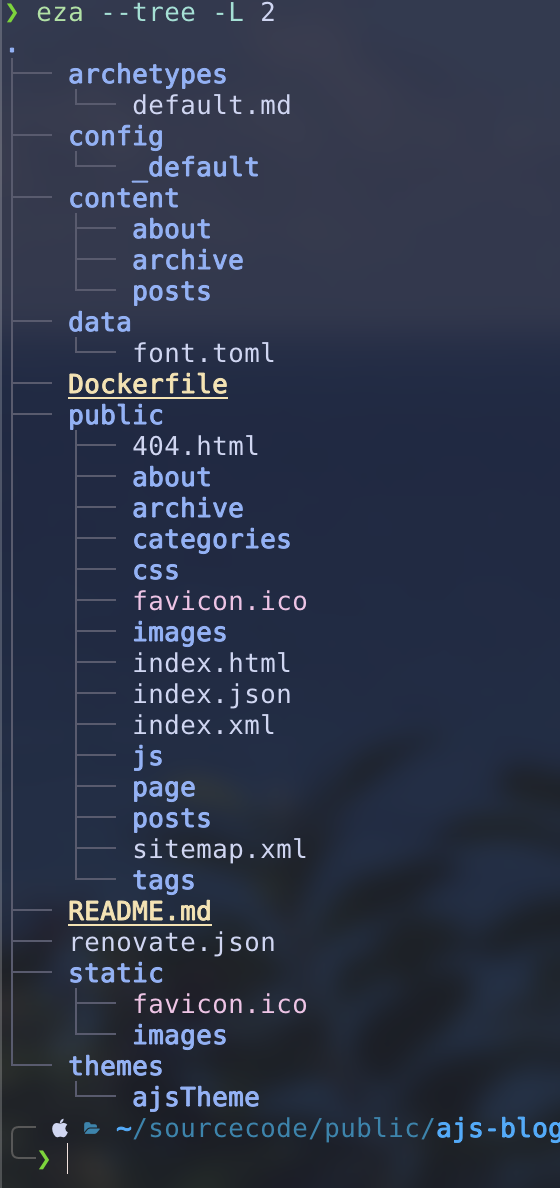
I simply have an alias for this to replace ls. (add alias ls=eza to your shell config) I use the tree view frequently.
Installation
macOS:
brew install ezaUbuntu:
sudo apt install ezaFedora:
sudo dnf install ezaVisualize disk usage for files with dust
Baseline: du
du -h --max-depth=1Modern alternative:
dustWhy it exists
du is accurate and scriptable, but the output often needs extra sorting or formatting before it answers the question “what’s taking up all the space?”
dust is optimized for that interactive question:
- Visual file size comparisons
- Intuitive output
- Safe defaults
If you want “just a couple levels deep”:
dust -d 2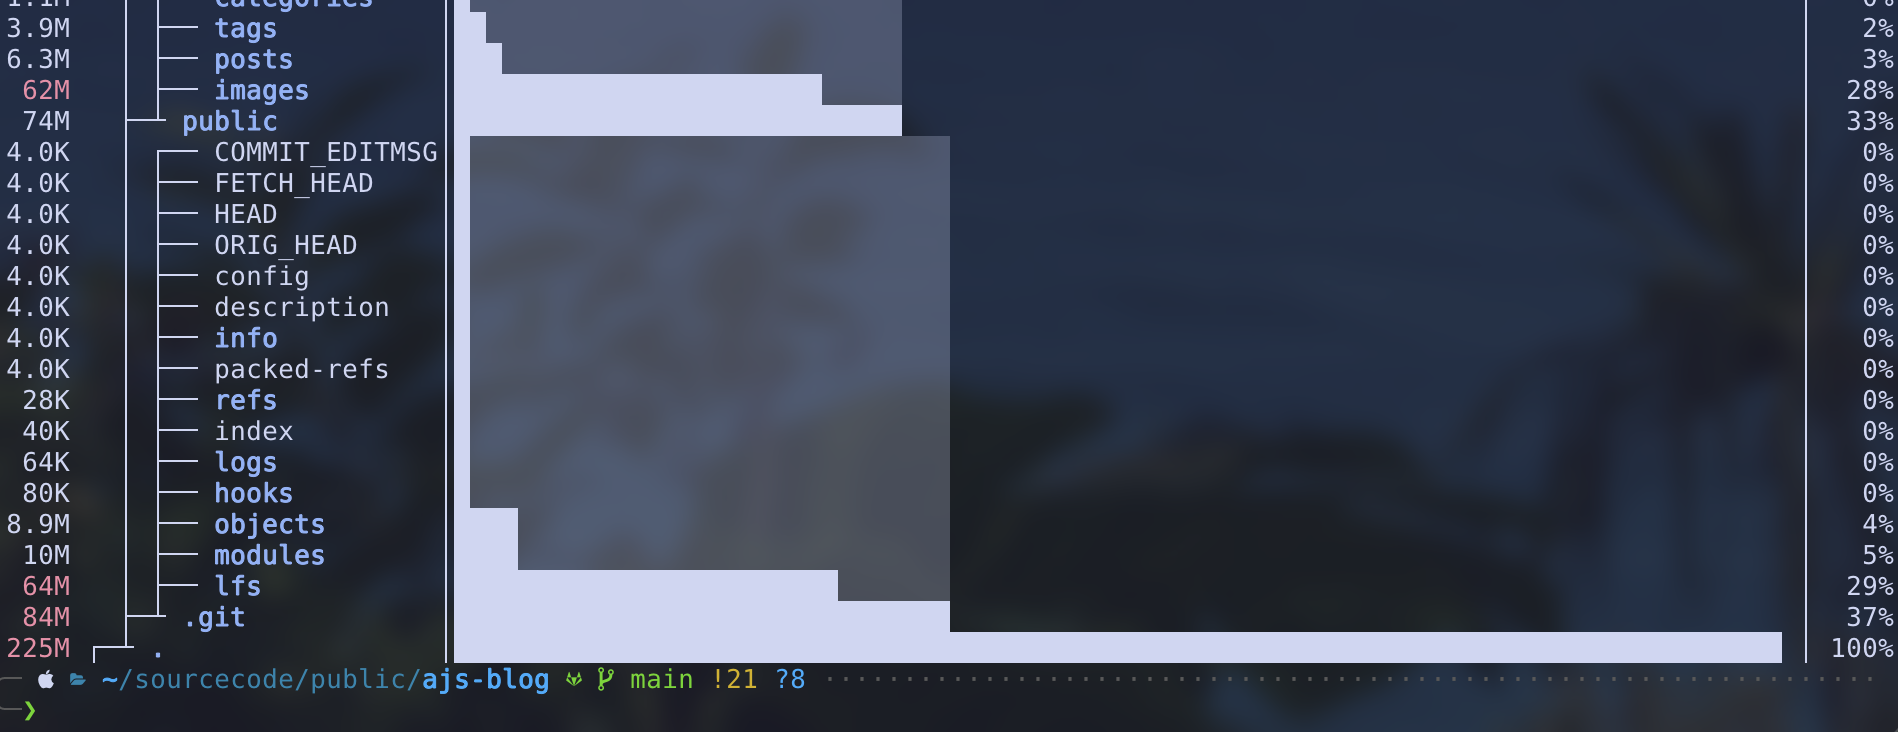
Installation
macOS:
brew install dustUbuntu:
sudo apt install dustFedora:
sudo dnf install dustShow filesystem usage with duf
Baseline: df
df -hWhy it exists
df is reliable, but it is easy to miss the important bits when you have many mounts (containers, network volumes, external drives).
duf presents disk usage in a compact, readable table:
- Human-friendly columns
- Clear mountpoint and filesystem info
- Filtering and color for quick scanning
duf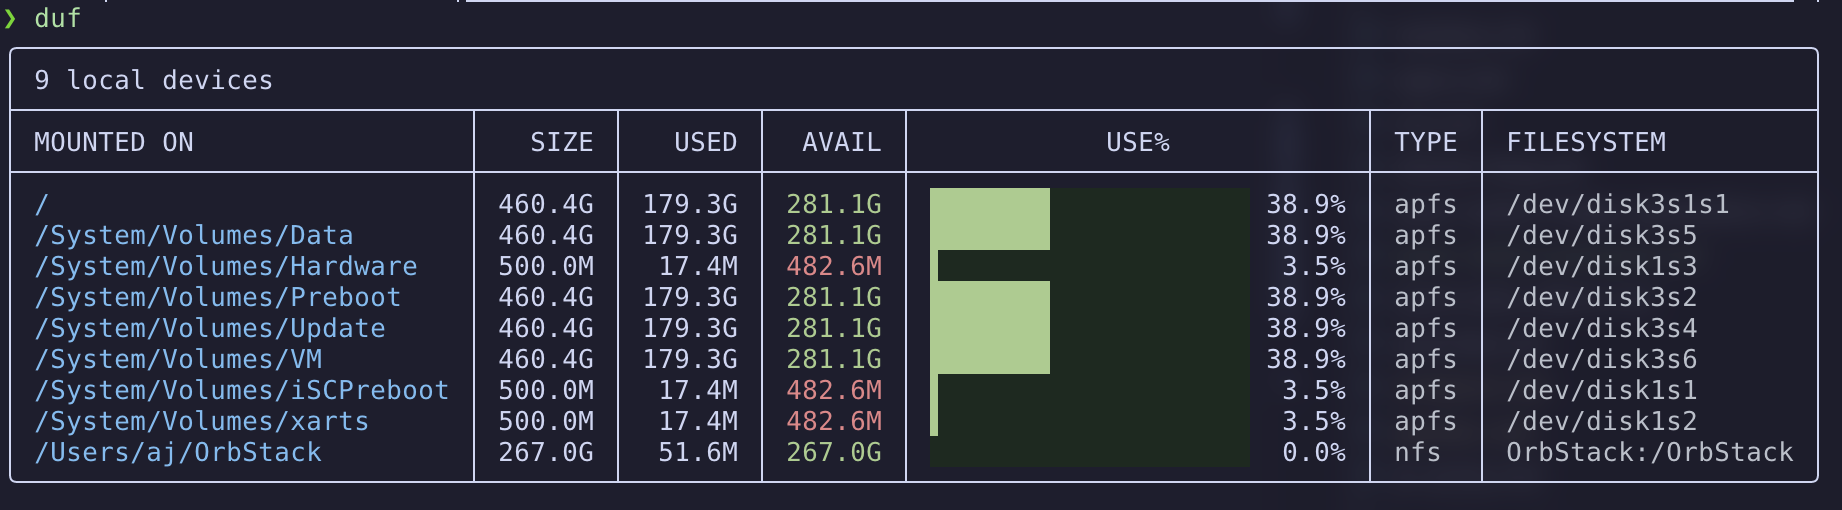
Installation
macOS:
brew install dufUbuntu:
sudo apt install dufFedora:
sudo dnf install dufPrint the contents of a text file with bat
Baseline: cat
cat config.yamlWhy it exists
cat is perfect for piping and scripts. But when you’re reading a file in a terminal, you usually want a little more context.
Modern alternative:
bat config.toml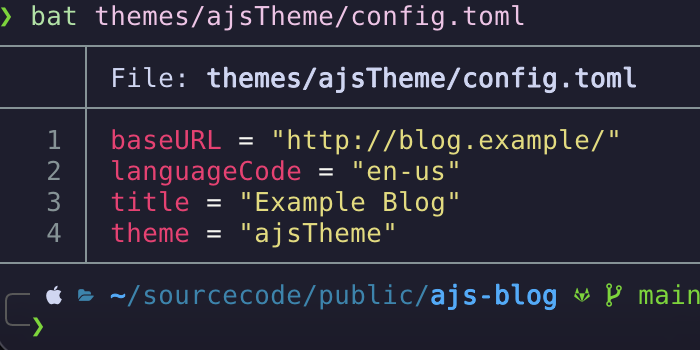
Adds:
- Syntax highlighting
- Line numbers
- Git-aware context
If you want it to behave more like cat (no paging, no decorations):
bat -p config.yamlInstallation
macOS:
brew install batUbuntu:
sudo apt install batFedora:
sudo dnf install bat(On Ubuntu, the binary may be batcat.)
Tools by Task
These tools aren’t direct coreutils replacements, but they’re great for common terminal tasks.
Navigation
zoxide
Baseline: cd
cd ~/projects/my-appWhy it exists
cd is predictable, but it is also repetitive: you end up retyping long paths, or maintaining a mental map of where things live.
zoxide learns your navigation habits and lets you jump with short fragments:
z my-appIt shines when you:
- Work across many repos and subdirectories
- Bounce between a handful of directories all day
- Want fuzzy matching without leaving the shell
Installation
macOS:
brew install zoxideUbuntu:
sudo apt install zoxideFedora:
sudo dnf install zoxideAfter you install, you need to add this to your Zsh profile:
eval "$(zoxide init zsh)"I don’t use an alias for this one, I do not want to “train” myself that cd behaves the same.
Project Environments
direnv
Why it exists
Project-specific environment variables are useful, but exporting them in your shell profile tends to leak settings across projects.
direnv is a small shell extension that loads and unloads environment variables automatically when you enter/leave a directory (typically via a checked-in .envrc file). For safety, changes require explicit approval with direnv allow.
High-level Zsh setup:
eval "$(direnv hook zsh)"Installation
macOS:
brew install direnvUbuntu:
sudo apt install direnvFedora:
sudo dnf install direnvHere is an example of how I have used this software at work:
Imagine you have a production environment but you also have a staging/development environment. There are going to be slightly different environment variables needed for each of these environments.
I can put a .envrc file in my repo so that when I navigate to the directory for the staging environment, I load a variable like AWS_PROFILE=dev. If I have resources in another directory for the production environment, I can create a different .envrc file to load AWS_PROFILE=prod.
It can also work with a .env file that you do NOT check into git. You can avoid storing sensitive variables such as API tokens in the repo (I add .env to .gitignore) using this strategy.
Secrets and Credentials
pass
Why it exists
You need a way to store secrets securely while still being able to use them from scripts and the terminal. pass keeps each secret as a GPG-encrypted file under ~/.password-store/, which makes it easy to back up and (optionally) version with Git.
pass requires a GPG key. A quick way to create one:
gpg --full-generate-key
gpg --list-secret-keys --keyid-format=long
Then initialize your password store with the key ID:
pass init <YOUR_KEY_ID>Installation
macOS:
brew install pass gnupgUbuntu:
sudo apt install pass gnupgFedora:
sudo dnf install pass gnupg2This tool is a lot more exciting than it sounds. My biggest gripe with password managers is all the button clicking just to copy a single password. With pass I can easily generate new passwords with a single command and pass that right to the clipboard and paste it wherever. The same goes for retrieving a password.
Structured Data
jq and yq
Baseline: sed + awk
cat data.json | sed -n '1,5p'Why it exists
Regex-based parsing works for plain text, but JSON/YAML are structured formats. When you parse them with sed/awk, you can end up with commands that break as soon as whitespace, ordering, or nesting changes.
jq and yq let you query structured data directly:
jq '.items[] | .name' data.json
yq '.services.web.port' config.yaml
They are especially handy for:
- Extracting a value to feed into another command
- Pretty-printing machine output for debugging
- Writing small “data plumbing” one-liners
Installation
macOS:
brew install jq yqUbuntu:
sudo apt install jq yqFedora:
sudo dnf install jq yq- jq GitHub link
- yq GitHub link
Networking and Downloads
httpie
Baseline: curl
curl -X POST https://api.example.com/items \
  -H "Content-Type: application/json" \
  -d '{"name":"test"}'
Why it exists
curl is the universal baseline and is perfect for scripts. For interactive API work, though, many people want less punctuation and more readable responses.
Modern alternative:
http POST https://api.example.com/items name=testProvides:
- Readable syntax
- Automatic JSON formatting
- Sensible defaults
Installation
macOS:
brew install httpieUbuntu:
sudo apt install httpieFedora:
sudo dnf install httpiearia2
Baseline: curl
curl -O https://example.com/file.isoWhy it exists
curl can download anything, but for large files and unreliable networks you quickly start caring about resuming, retries, and throughput.
aria2 handles multi-connection downloads and supports HTTP, FTP, BitTorrent, and SFTP.
aria2c https://example.com/file.isoInstallation
macOS:
brew install aria2Ubuntu:
sudo apt install aria2Fedora:
sudo dnf install aria2If I want to download something and I already have a link, this tool is easier than messing with curl.
Interactive Selection
fzf
Baseline: pipes + grep + sed
ls | grep confWhy it exists
Pipelines like ls | grep work, but they require you to know what you’re looking for ahead of time.
Zsh, combined with fzf, turns the shell into an interactive interface rather than just a prompt.
fzf is a general-purpose fuzzy finder that turns lists into interactive interfaces.
Examples:
ls | fzf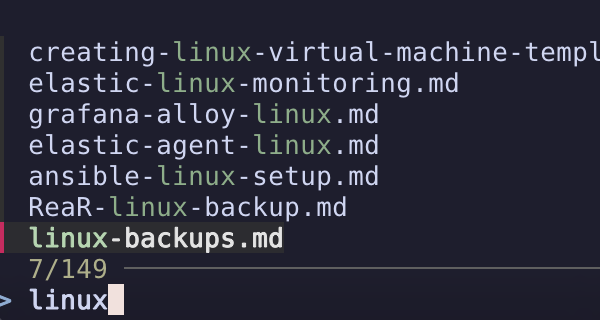
It pairs well with other modern tools:
rg --files | fzfCommon uses:
- File selection
- Command history search
- Git branch selection
- Process picking
fzf is optional but once integrated into your shell it becomes addictive. I do miss it on systems that do not have it.
Installation
macOS:
brew install fzfUbuntu:
sudo apt install fzfFedora:
sudo dnf install fzfDocumentation
tldr
Baseline: man
man tarWhy it exists
man pages are comprehensive, but they are not optimized for “show me an example”.
When you’re in the middle of something, you often want one working example more than you want a full reference guide.
tldr pages show the most common examples first:
tldr tar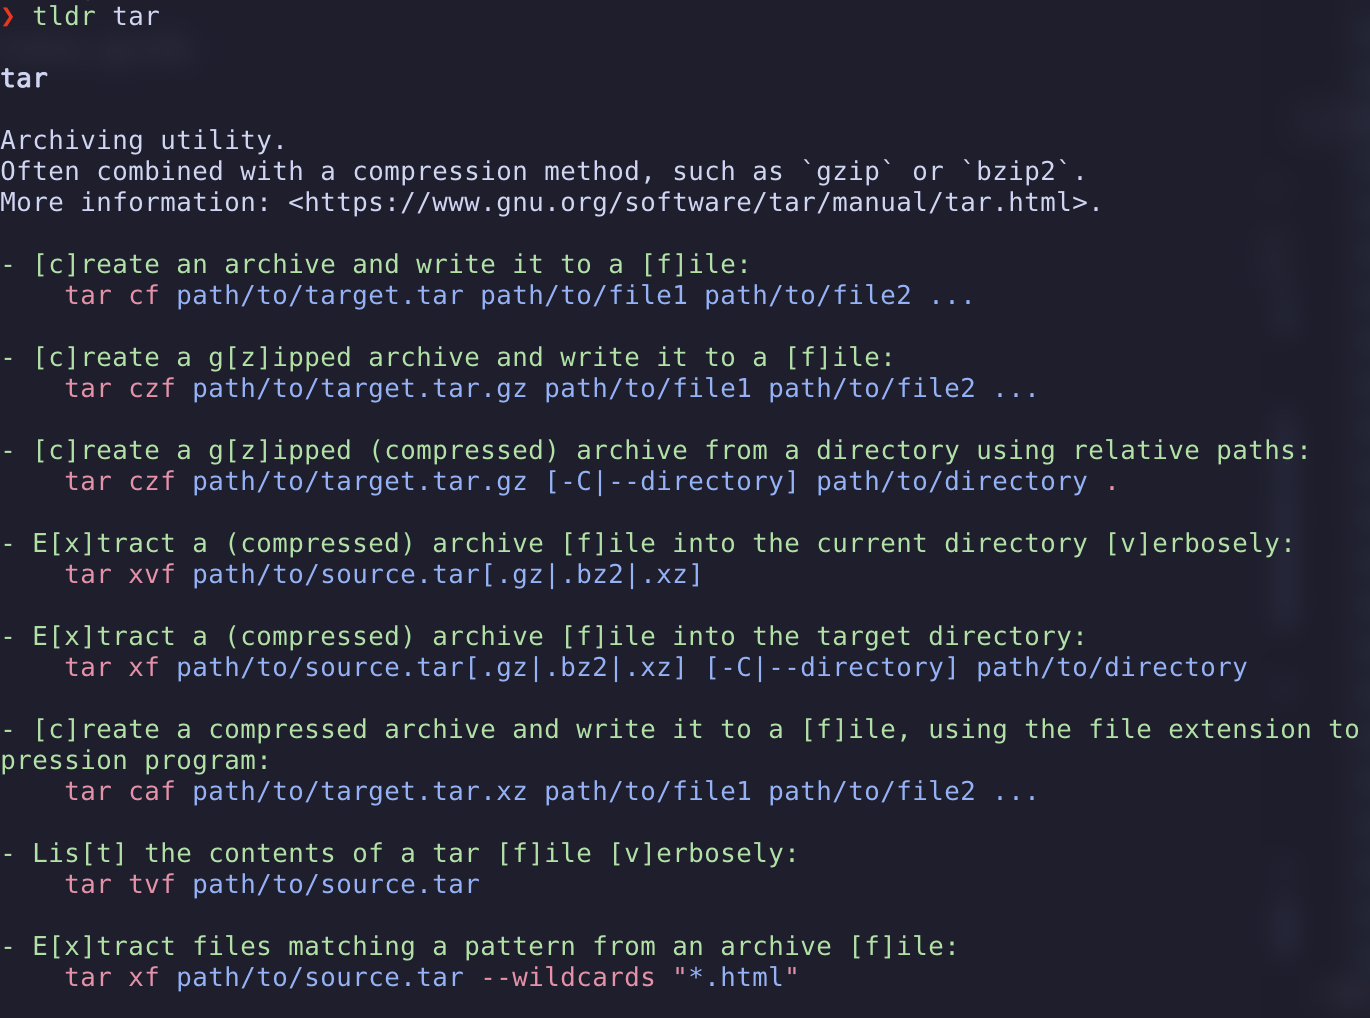
Installation
macOS:
brew install tldrUbuntu:
sudo apt install tldrFedora:
sudo dnf install tldrIf your distro doesn’t package tldr, use the Rust client:
cargo install tlrc --lockedEditing
Neovim
Baseline: vi
vi exists everywhere and edits bytes well, but it is difficult to extend the capabilities and add features like real-time linting and debugging.
Why it exists
Neovim modernizes Vim’s model without abandoning its principles:
- Terminal-native
- Scriptable with Lua
- Built for composition
- Fast on remote systems
- A strong ecosystem for LSP, linting, formatting, and debugging
Example:
nvim .Installation
macOS:
brew install neovimUbuntu:
sudo apt install neovimFedora:
sudo dnf install neovimFor newer releases on Ubuntu, use the Neovim PPA or AppImage.
Sessions and Monitoring
zellij
Baseline: tmux
tmuxWhy it exists
tmux is the classic answer for persistent terminal sessions, but it often requires configuration before it feels comfortable.
zellij ships with rich defaults and a plugin system, so you can get panes, tabs, and sessions with less setup and more on-screen discoverability.
Example:
zellij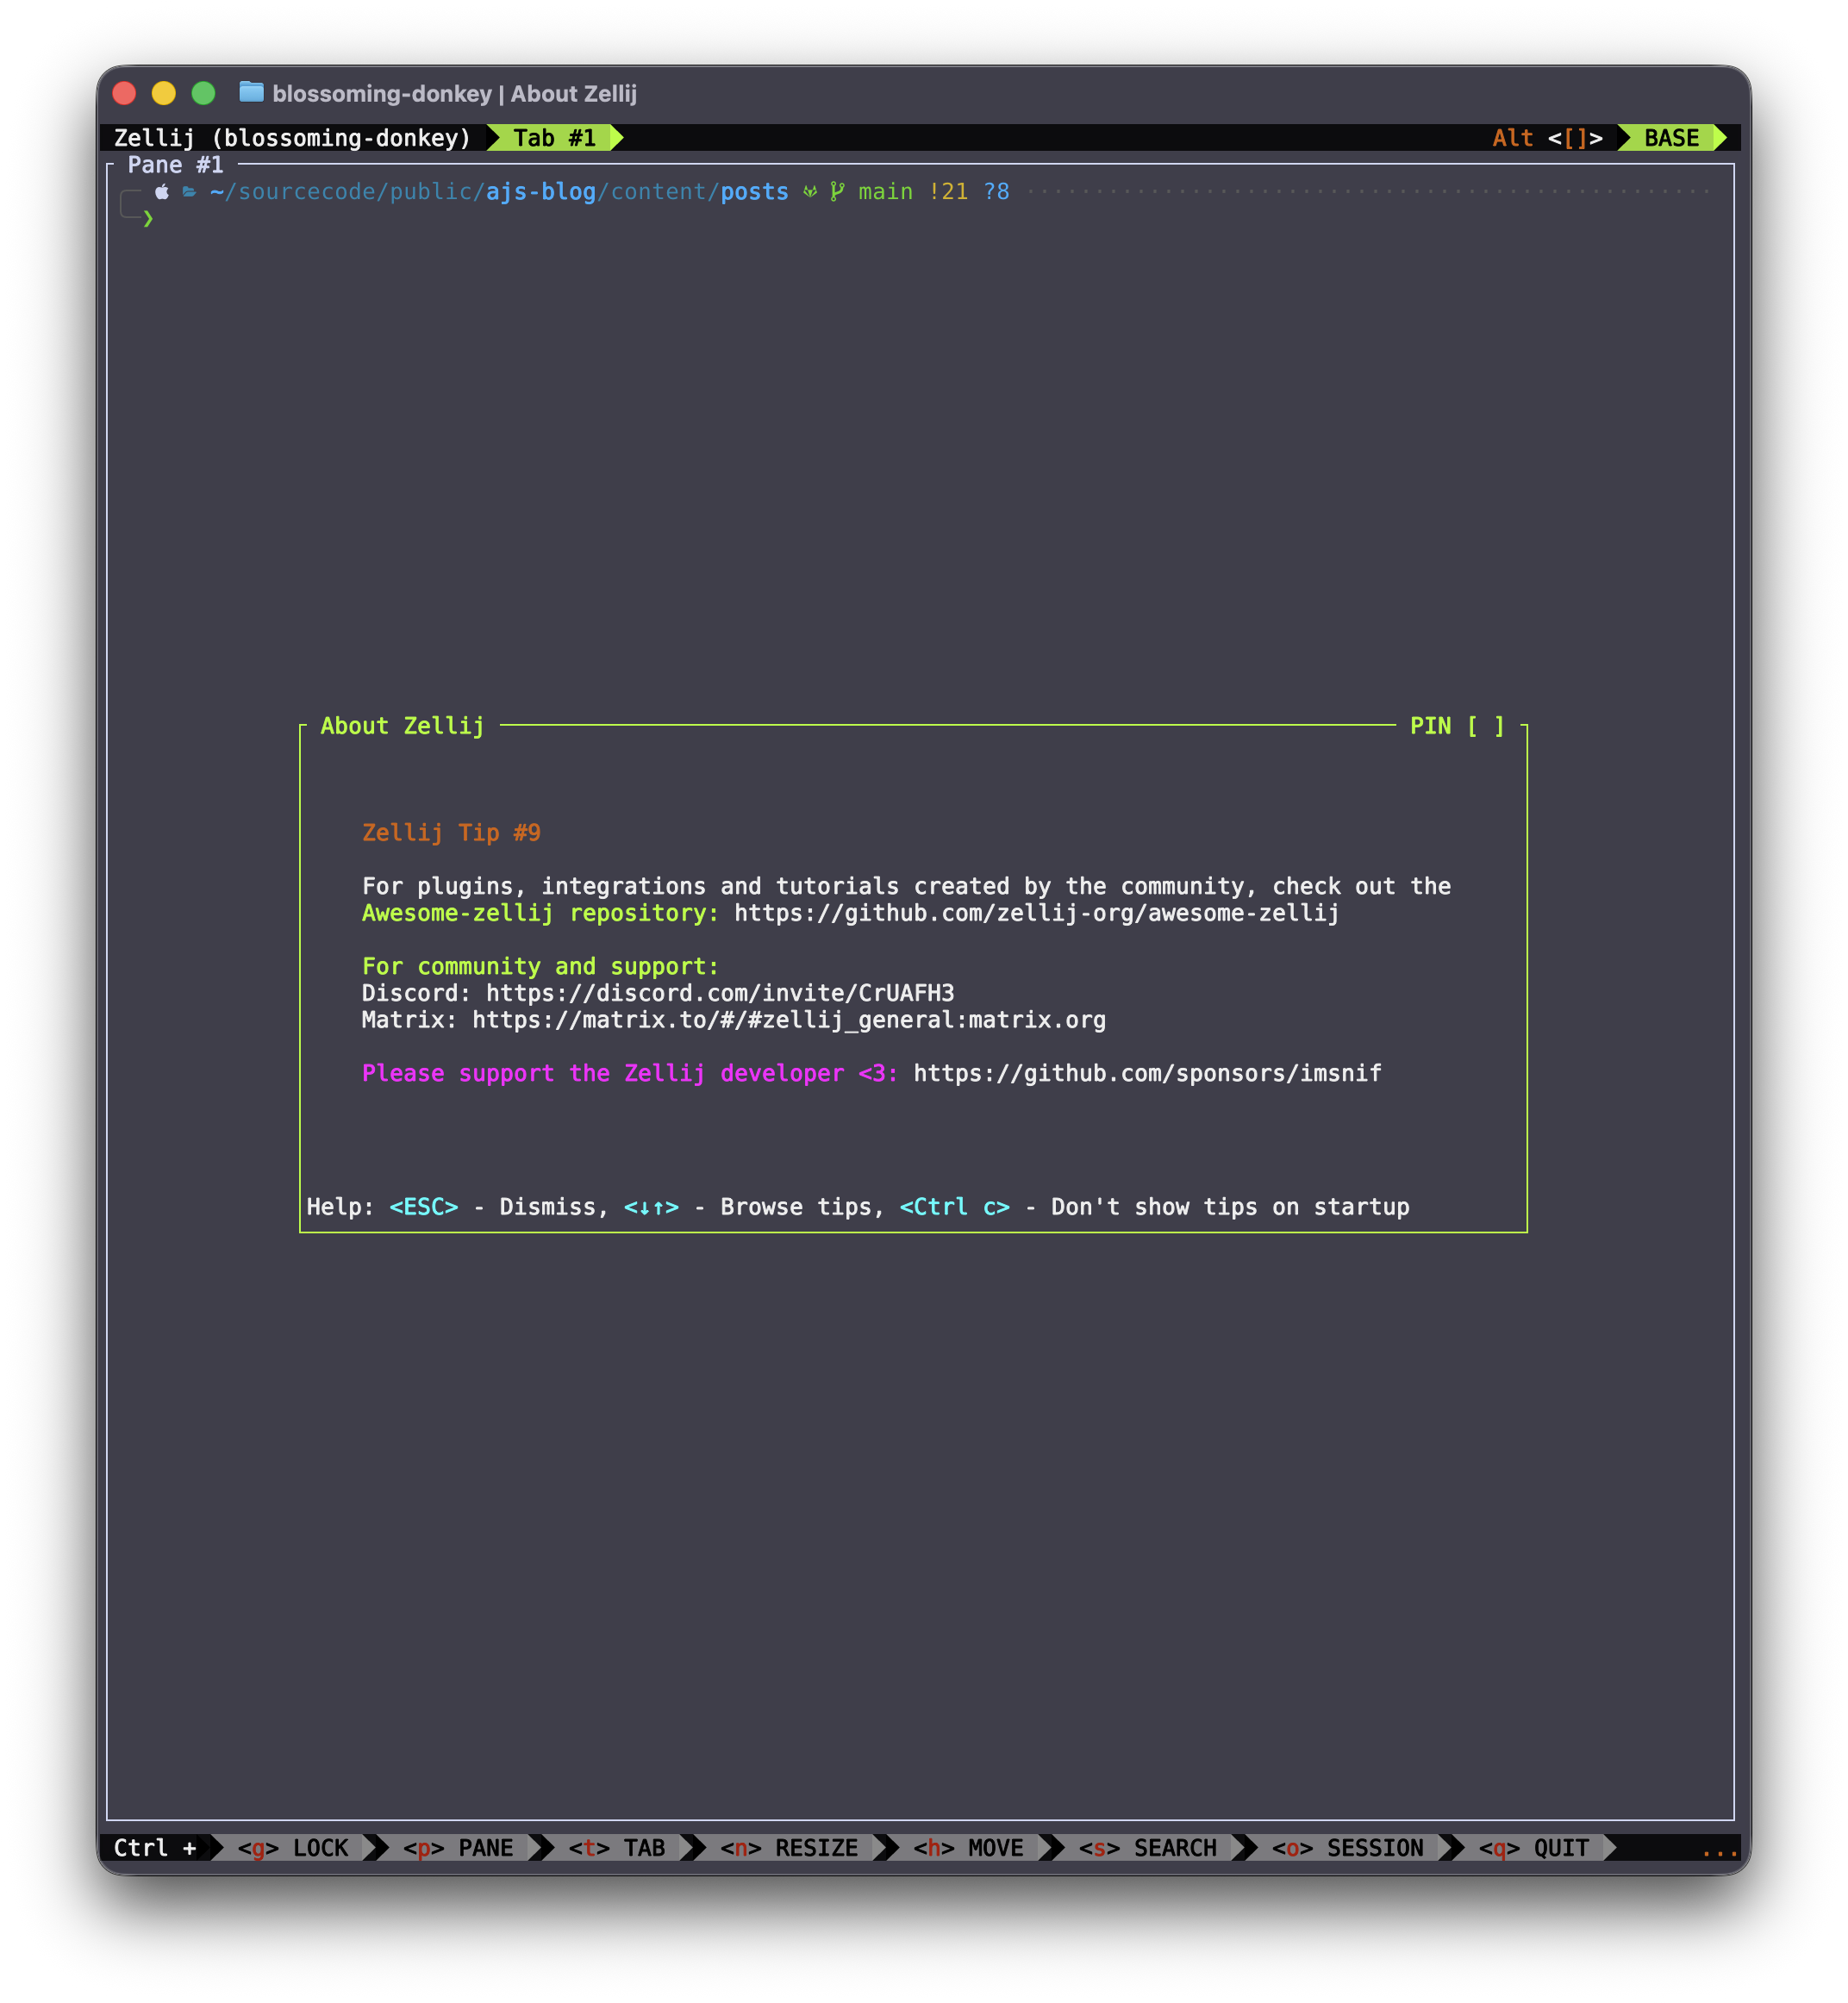
Installation
macOS:
brew install zellijUbuntu:
sudo apt install zellijFedora:
sudo dnf install zellijbtop
Baseline: top
topWhy it exists
top is universal, but it is dense. When you’re troubleshooting, you often want patterns (spikes, trends, per-core behavior) more than raw columns.
btop provides a visual, interactive view of CPU, memory, disk, and network usage that’s easier to scan at a glance.
Example:
btop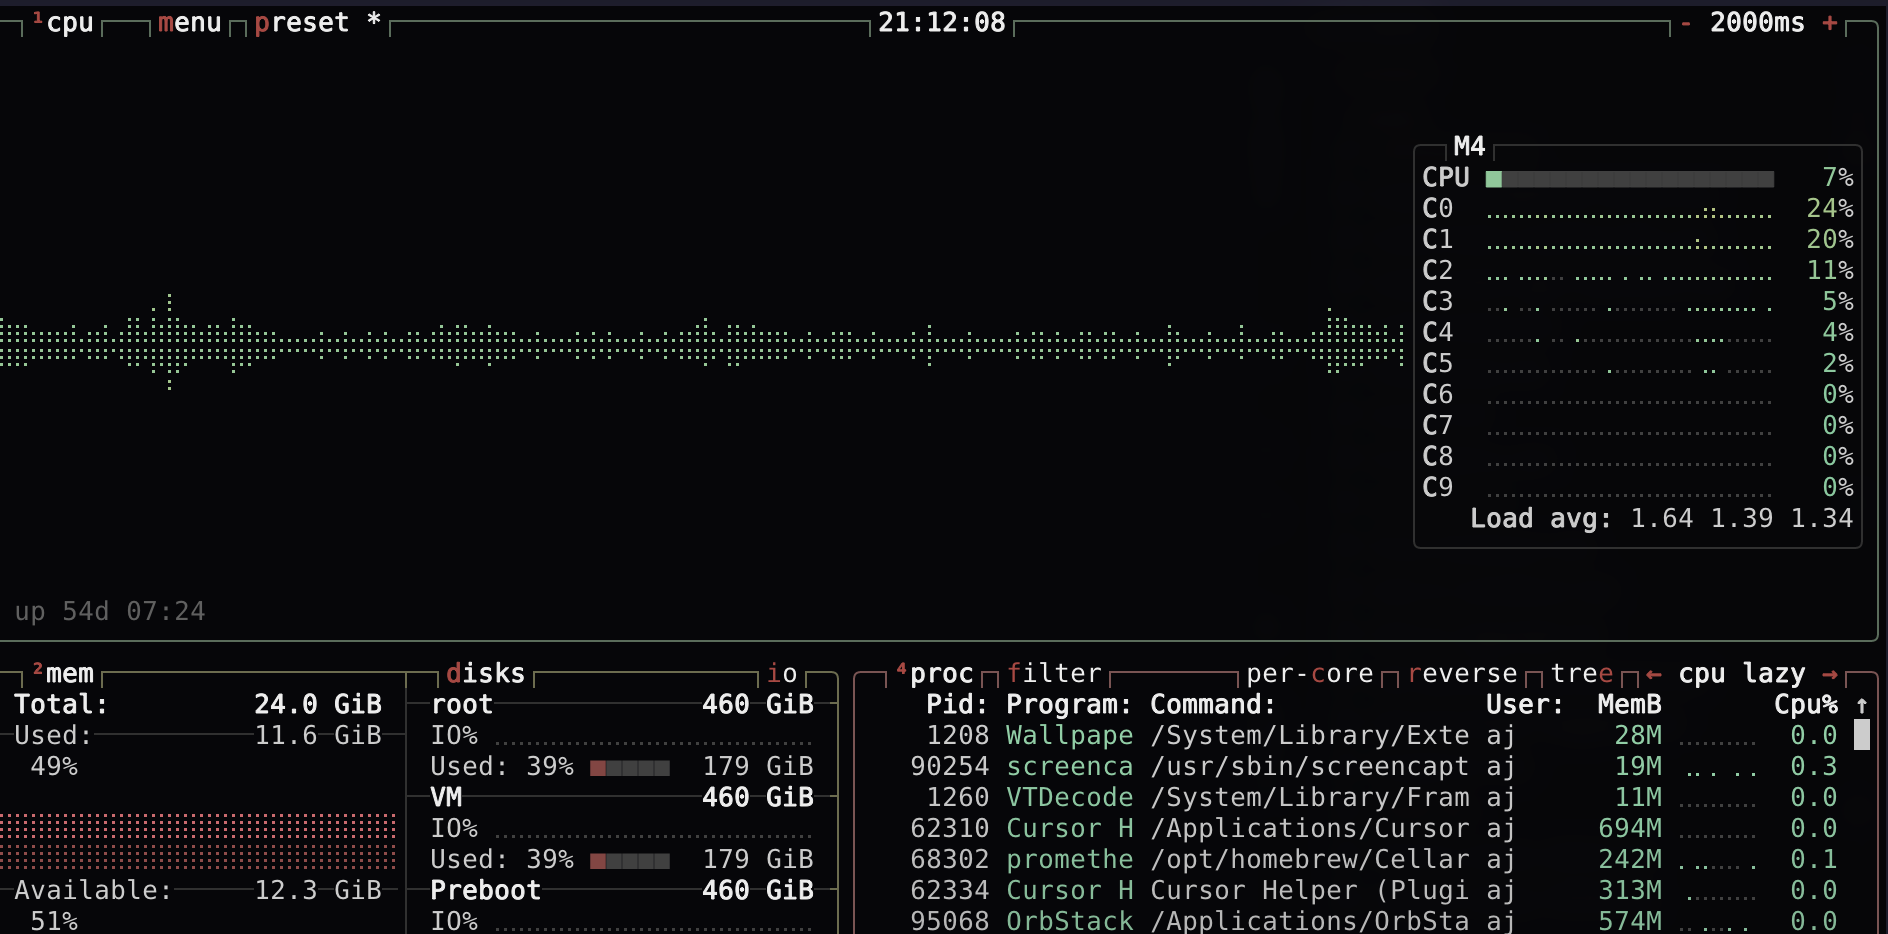
Installation
macOS:
brew install btopUbuntu:
sudo apt install btopFedora:
sudo dnf install btopContainers
ctop
Baseline: docker stats
docker statsWhy it exists
docker stats is a good baseline, but once you have more than a couple containers you usually want filtering, quick selection, and the ability to drill in without re-running commands.
ctop gives you a top-like dashboard for local containers.
Example:
ctop
Installation
macOS:
brew install ctopUbuntu:
sudo apt install ctopFedora:
sudo dnf install ctoplazydocker
Why it exists
If you work with containers locally, lazydocker brings the same benefits Lazygit brings to Git:
- Inspect containers, images, and volumes
- View logs without context switching
- Perform common actions safely
Example:
lazydocker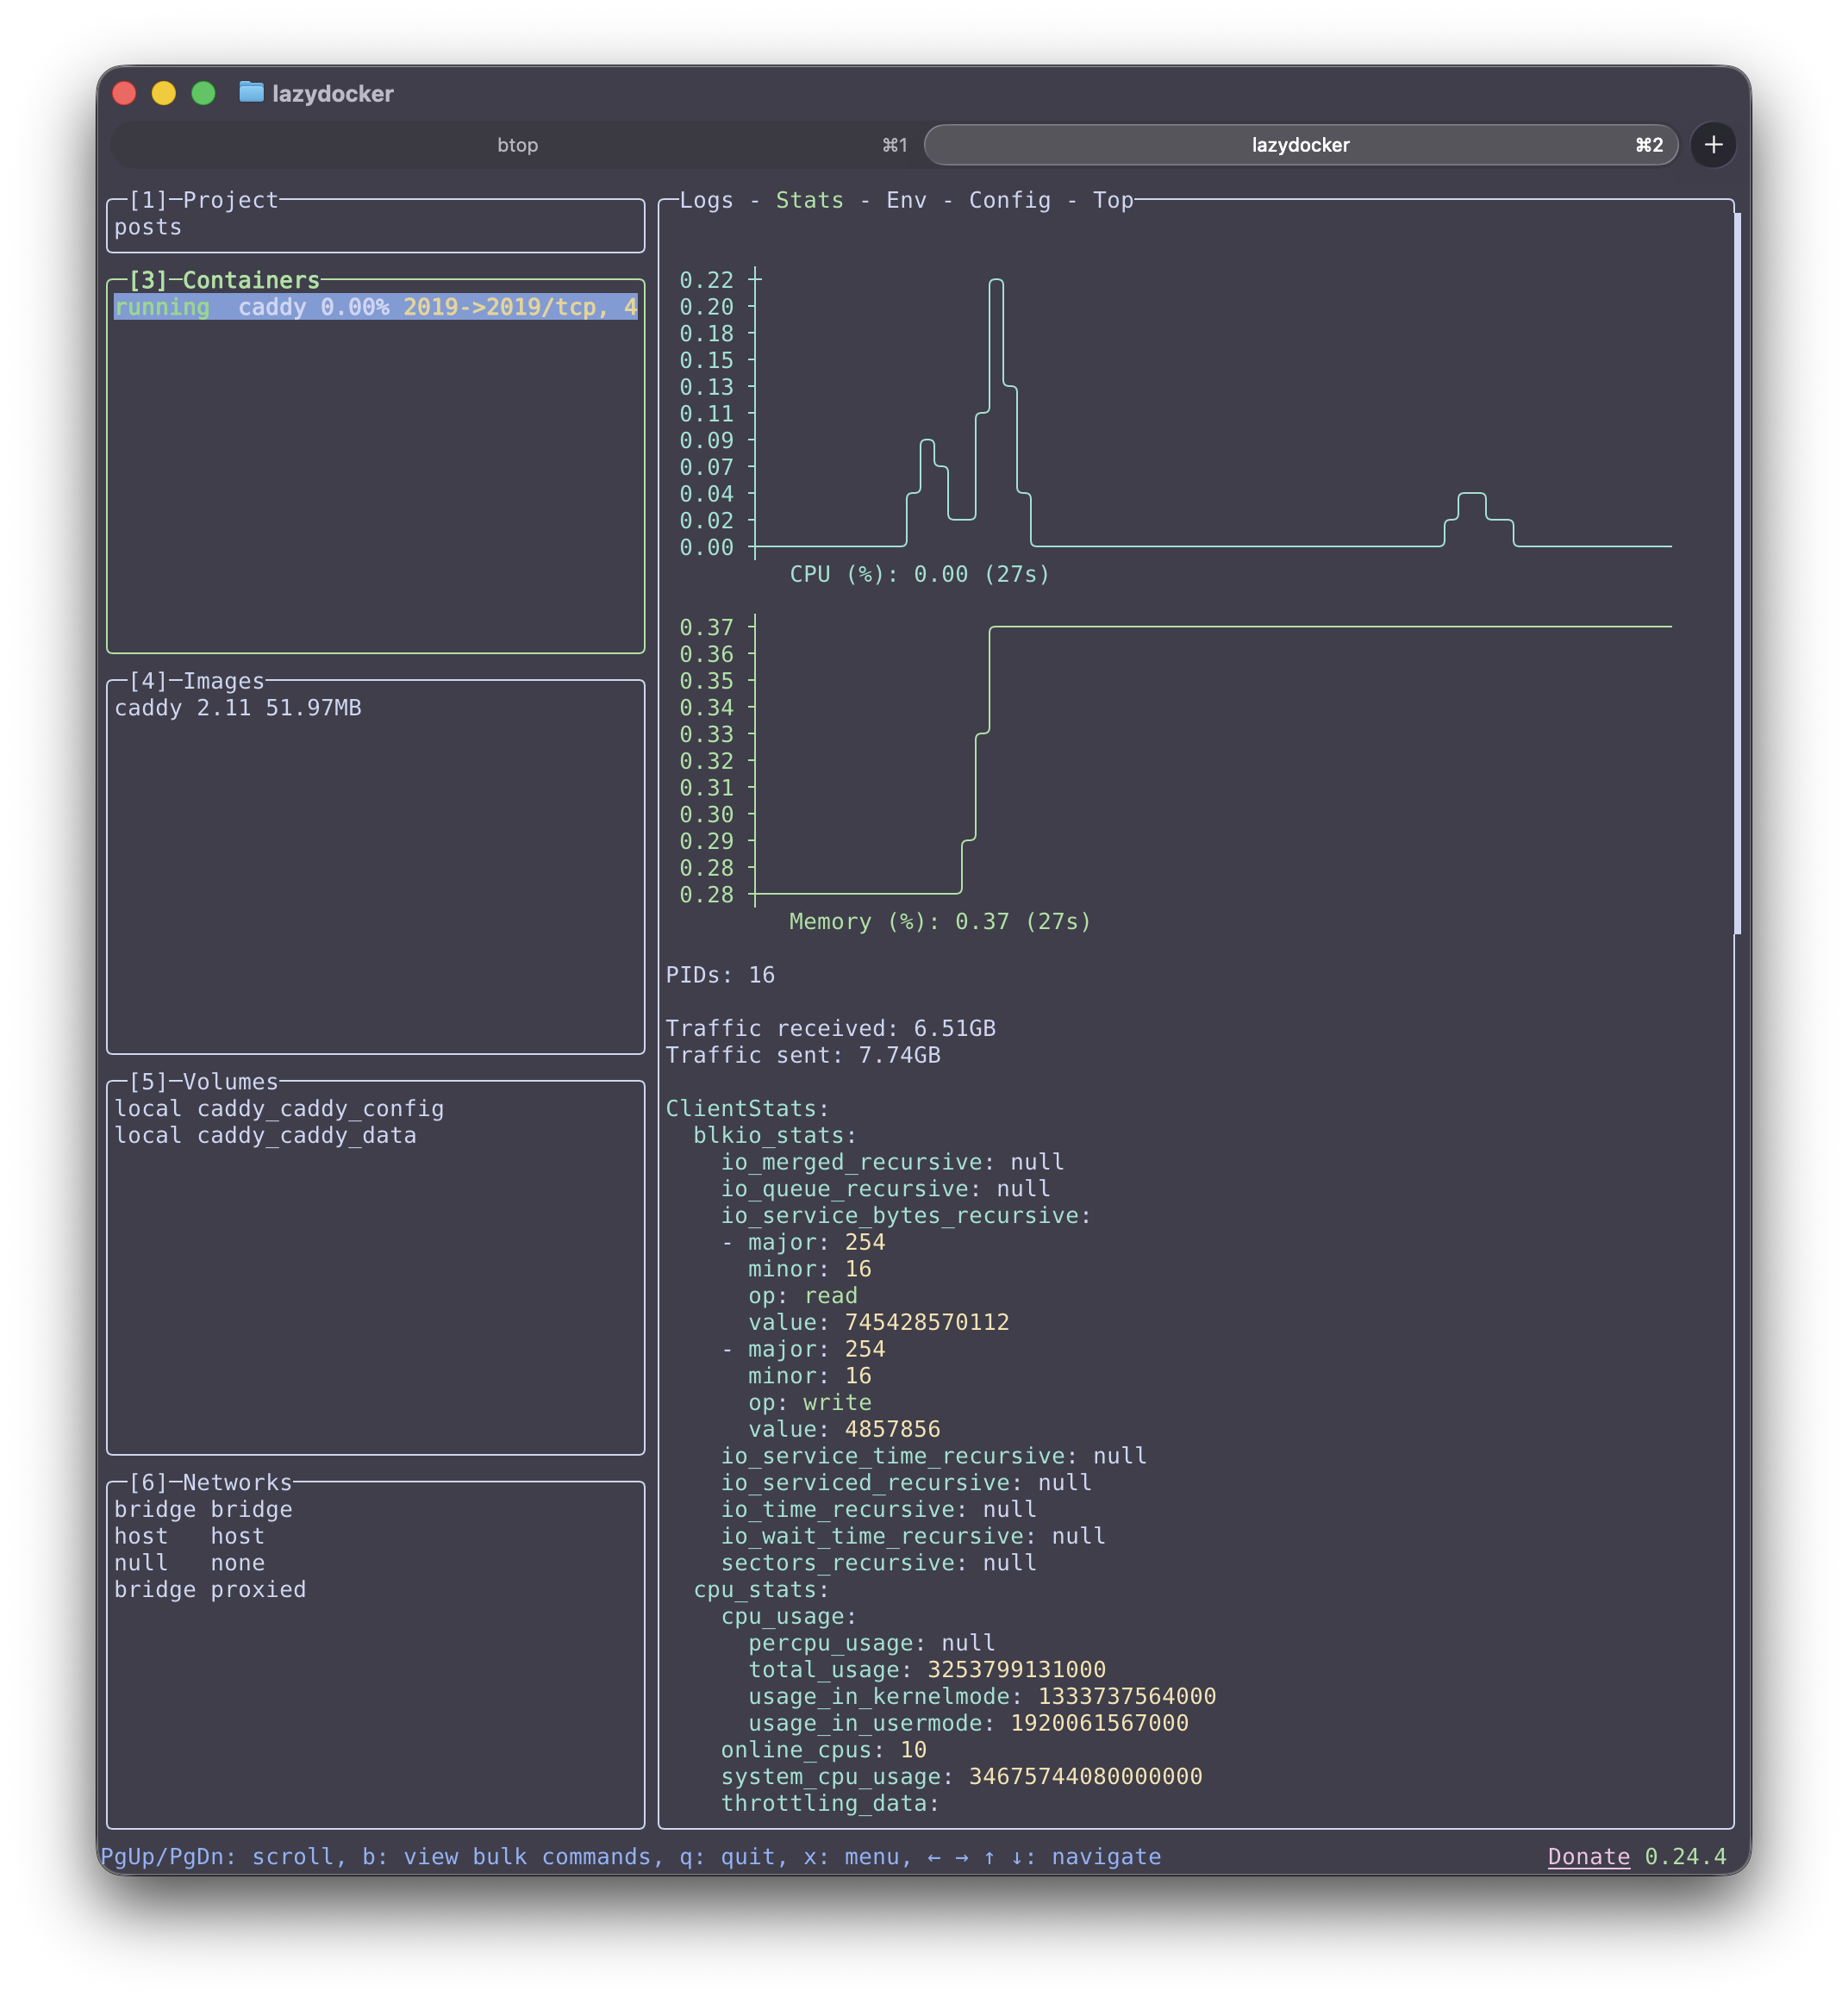
Installation
macOS:
brew install lazydockerUbuntu:
sudo apt install lazydockerFedora:
sudo dnf install lazydockerCloud Sync
rclone
Why it exists
rsync is fantastic for machines you can SSH into. Once you add “cloud storage” to the mix, you need credentials, APIs, and provider-specific behavior.
rclone syncs files to S3, Google Drive, and many other providers using an rsync-like interface, which makes it a practical tool for backups and bulk transfers.
Example:
rclone listremotesInstallation
macOS:
brew install rcloneUbuntu:
sudo apt install rcloneFedora:
sudo dnf install rcloneCodebase Metrics
scc
Baseline: wc
find . -type f -name "*.go" | xargs wc -lWhy it exists
Counting lines with find + wc works, but it quickly turns into a mini-project once you need language detection, exclusions (vendor/build output), and a summary you can compare over time.
scc scans a directory and summarizes lines of code per language. I do not use it often but once in a while it is useful to analyze your project.
Example:
scc .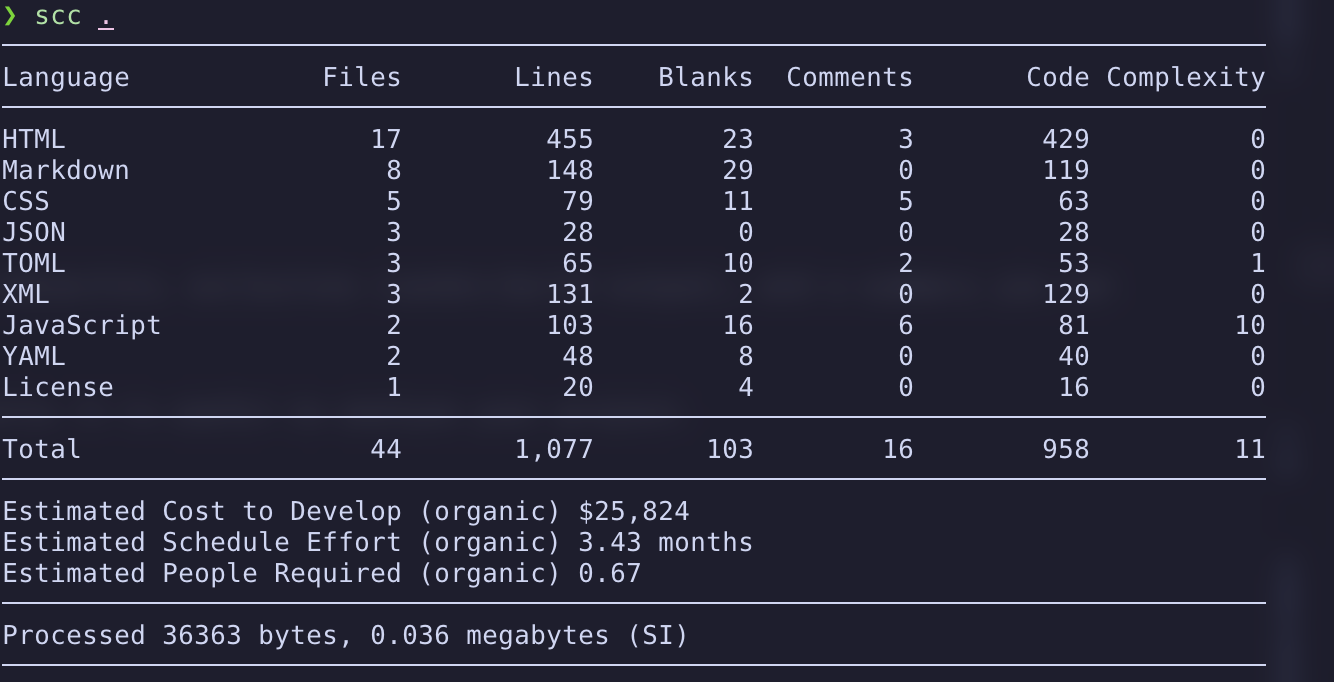
Installation
macOS:
brew install sccUbuntu:
sudo apt install sccFedora:
sudo dnf install sccIf your distro doesn’t package scc, use:
go install github.com/boyter/scc/v3@latestVersion Control
git
Why it exists
Modern workflows assume Git is present because it gives you:
- A history you can inspect and rewind
- Branching for experimentation
- A common interface for collaboration (reviews, CI, and releases)
Git integrates with:
- Editors
- Search tools
- CI systems
- Prompts and terminals
Example:
git statusI would not be willing to work anywhere that does not use git or some kind of version control system. It is also useful for personal projects, you do not need to save every version of your project when git can look back at the history of a file.
Installation
macOS:
brew install gitUbuntu:
sudo apt install gitFedora:
sudo dnf install gitdelta
Why it exists
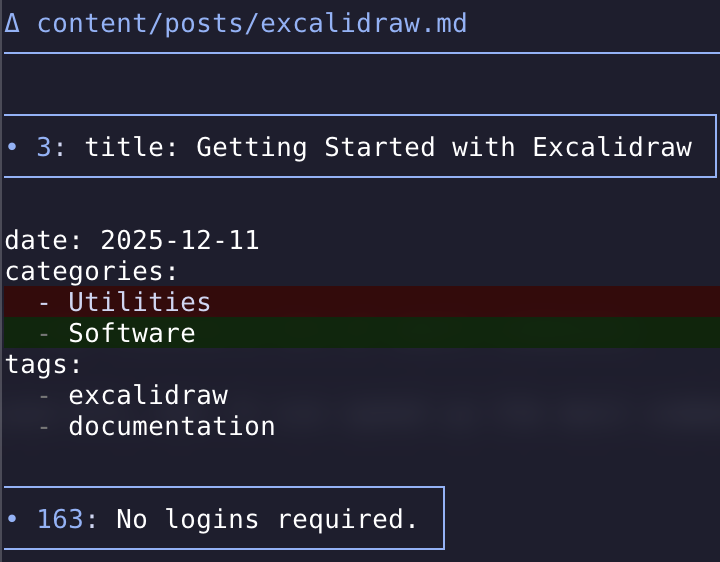
git diff is the universal baseline, but diffs can get hard to scan once changes are large or files have syntax. delta is a pager that makes diffs easier to read with syntax highlighting and better layout.
Installation
macOS:
brew install git-deltaUbuntu:
sudo apt install git-deltaFedora:
sudo dnf install git-deltaA small ~/.gitconfig snippet:
[core]
  pager = delta

[interactive]
  diffFilter = delta --color-only

[delta]
  navigate = true
Now when you run git diff you will see the new interface provided by delta.
lazygit
Why it exists
Git is powerful, but some tasks (staging hunks, browsing history, switching branches, resolving conflicts) can involve a lot of small commands.
lazygit provides a terminal UI for Git that puts common operations at your fingertips. It does not replace Git, but it can speed up the most common workflows day-to-day.
Example:
lazygit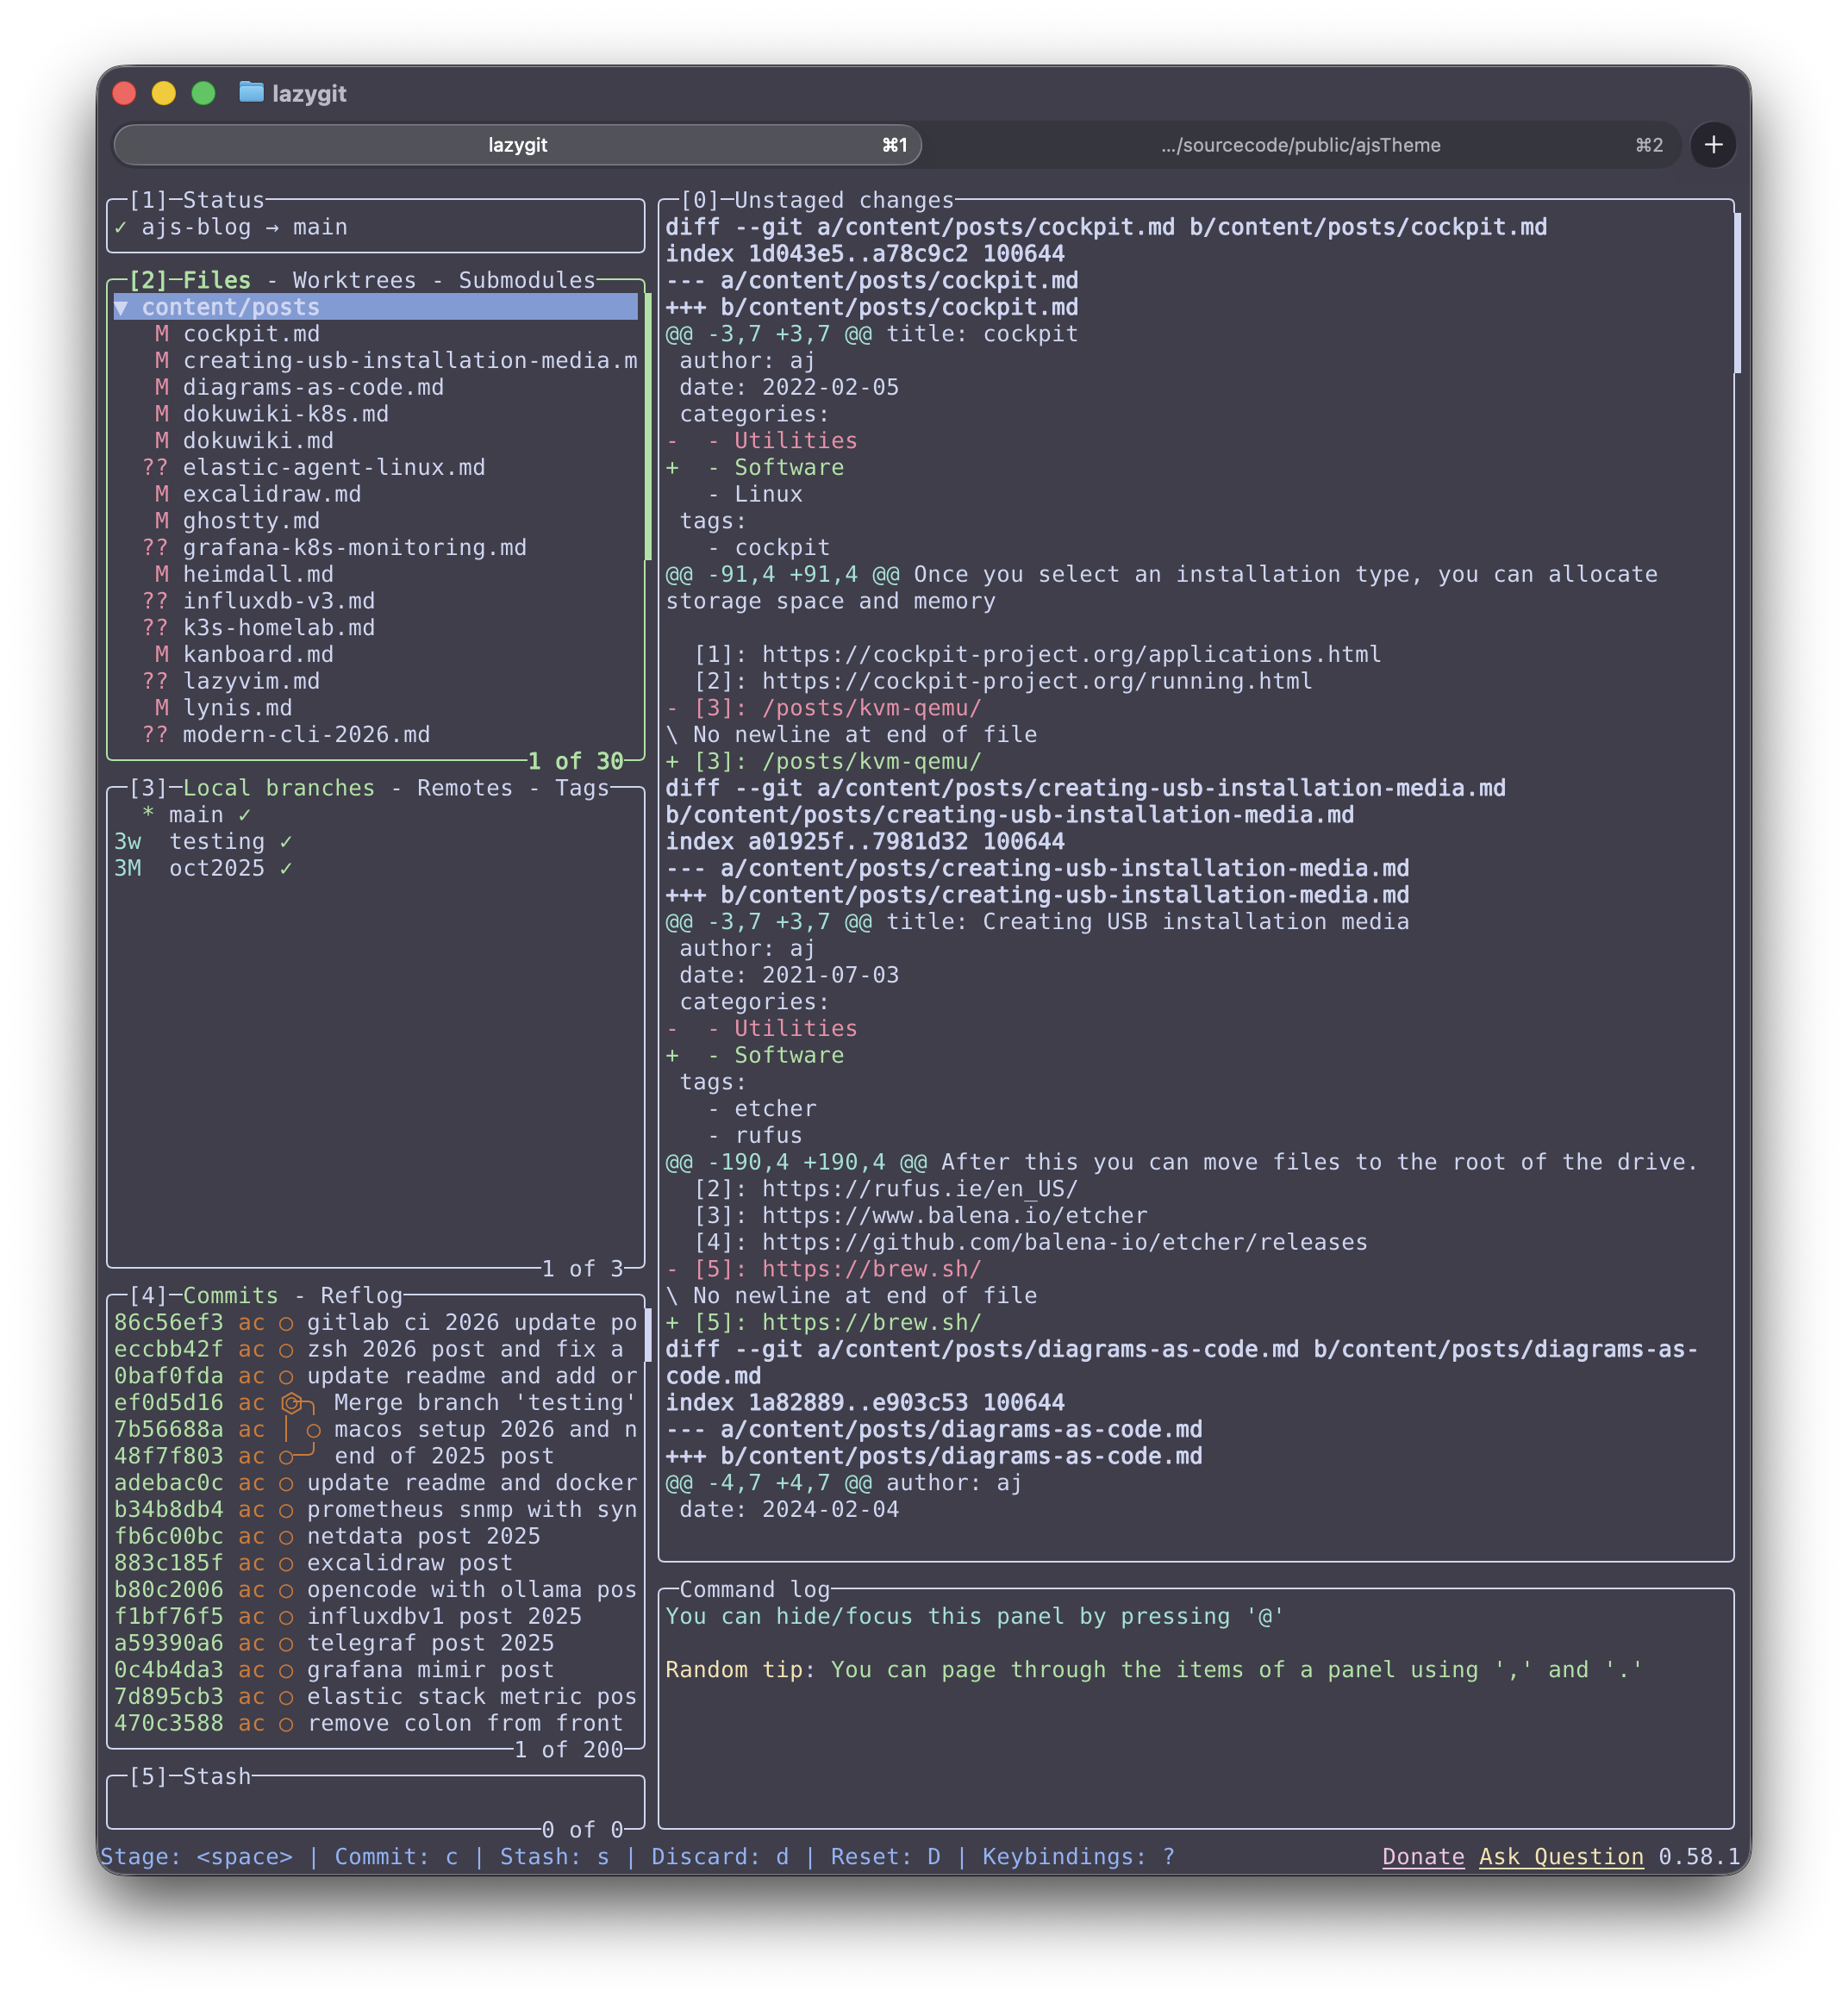
Installation
macOS:
brew install lazygitUbuntu:
sudo apt install lazygitFedora:
sudo dnf install lazygitTerminal Setup
Nerd Fonts
Coreutils assume plain text. Modern tooling layers meaning on top of it.
Why it exists
Many modern prompts and tools use icons as compact labels (git state, diagnostics, file type). Without a Nerd Font, those glyphs either render as squares or disappear.
A Nerd Font provides:
- Git status glyphs
- Diagnostics icons
- File-type indicators
These icons are built right into the font and do not require any special software to render.
Example:
fc-list | grep -i "nerd"Installation
Installation varies by font; most are available via Homebrew Cask or direct download on Linux.
Ghostty
Coreutils only assume a TTY. Modern terminals dramatically improve feedback and performance.
Why it exists
If you spend hours a day in a terminal, the terminal emulator becomes part of your toolchain: rendering speed, Unicode correctness, font handling, and copy/paste behavior all affect how frictionless the command line feels.
All of this lives inside a terminal.
For a modern, GPU-accelerated, terminal, I recommend Ghostty. Check out a previous post for info to set up Ghostty.
Example:
ghostty --versionInstallation
See ghostty.org for installers and releases.
Where GNU Coreutils Still Win
Despite all of the tooling covered here, coreutils are not obsolete.
They are still the right choice when you are writing shell scripts, bootstrapping systems, working in constrained environments, or doing anything that must run unchanged across machines you do not control.
Modern tools assume context. Your dotfiles, your terminal, your preferences. Coreutils assume nothing. That is not a limitation. It is the reason they have lasted.
The goal of a modern command‑line workflow is not to replace coreutils, but to recognize where they shine and where interactive tools make day‑to‑day work faster and clearer.
Closing thoughts
I believe that all of the software I looked at today is open-source and I know there are thousands of other projects out there. I don’t have time to test them all but I encourage you to share open-source projects that you rely on with others and in 2026, creating your own project is easier than ever with AI coding tools.
Disclaimer: I used an LLM to help create this post. Opinions expressed are likely from me and not the LLM.