Image generation in open-webui
updated: 2025-03-09
After running LLMs locally using Ollama and open-webui, I realized that the project has experimental support for image generation. If you are not familiar with those, check out a previous post to learn more and get started.
I have seen image generation tools online but I never bothered to look into how to do it with a GPU. Fortunately I am late to the party and there are now a lot of tools available to make leveraging the underlying technology easier. At this time open-webui supports a few different image generation tools: AUTOMATIC1111, ComfyUI, and OpenAI DALL·E. Now that last one would not run locally and requires an OpenAI API key and will cost you to use. I believe that AUTOMATIC1111 is easier to work with but ComfyUI is more robust.
Prerequisites
I run Ollama and open-webui on Linux with a NVIDIA GPU. There are other ways to run all of these AI tools without NVIDIA but my instructions will assume you are on a Linux system with an NVIDIA GPU and drivers installed.
ComfyUI
I will be setting up ComfyUI and that tool requires Python and an assortment of Python libraries. Please refer to the official documentation in case the steps I followed have changed. I believe that there is a bundled installer for ComfyUI if you are on Windows. I believe it is possible to use a container, but I am still learning how to use pytorch tools and they require access to a GPU and the CUDA toolkit from NVIDIA. There are other libraries available for AMD and Intel GPUs. I gave up on AMD years ago.
To keep the system clean, we can use a virtual environment to manage a Python environment for usage only with ComfyUI.
On Fedora Linux I can install specific versions of python and have multiple versions available. To install a certain version, for example python3.12 for ComfyUI:
sudo dnf install python3.12 python3.12-develThat will install python and the development headers on Fedora.
I highly recommend using uv to manage python dependencies instead of the built in venv module in python. On Fedora I can install the uv package. For more details for the platform you use, check out the project documentation.
You will also need git installed to download ComfyUI. https://git-scm.com/book/en/v2/Getting-Started-Installing-Git
Install ComfyUI Linux
First you need to clone the git repo for ComfyUI.
git clone git@github.com:comfyanonymous/ComfyUI.gitCreate an environment with uv. Alternatively, you can create a python virtual environment.
uv venv --python 3.12Or to create a virtual environment:
python -m venv .venvNo matter how you create a virtual environment, you can activate it in the shell:
source .venv/bin/activateFor Nvidia, install the proper dependencies:
uv pip install pytorch torchvision torchaudio pytorch-cuda=12.1 -c pytorch -c nvidiaNOTE: If you have a NVIDIA blackwell GPU, try the experimental builds of pytorch
uv pip install --pre torch torchvision torchaudio --index-url https://download.pytorch.org/whl/nightly/cu128If you are using a basic python virtual environment, omit uv before pip in the previous and subsequent commands I list.
Then open ComfyUI repo and install the Python dependencies for ComfyUI into the virtual environment:
cd ComfyUI
uv pip install -r requirements.txt
Once those are installed, ComfyUI can be started by executing the main.py file:
python main.pyThat will start the program in your terminal. If you have screen or tmux those can be used to run ComfyUI and you can detach with
To have the webserver listen on all interfaces, run the main file with an extra argument:
python main.py --listen 0.0.0.0With luck ComfyUI will be running but out of the box it will not do anything. To actually generate images we need to download a model that someone else has created. I do not have the resources to train my own.
In addition to models, ComfyUI presents you a node based workflow editor. You can import and export workflows as .JSON files and many AI models include some example workflow files to get started.
Download AI models and workflows for ComfyUI
I have been trying various AI models out and I would recommend Stable Diffusion 3.5 or Flux1.Dev if you have 64GB of memory.
SD3.5L
The model I will be using is Stable Diffusion 3.5 Large. You can download the base model by creating a free account with huggingface.
This is the file we are looking for and it will require you to be authenticated to download: https://huggingface.co/stabilityai/stable-diffusion-3.5-large/blob/main/sd3.5_large.safetensors
This base model is known as a checkpoint and copy this file into ComfyUI/models/checkpoints
There are a few other files required to get this working. You need to download text encoder files if you don’t have them already from SD3, Flux or other models. These translate text prompts into parameters the AI model can use.
https://huggingface.co/Comfy-Org/stable-diffusion-3.5-fp8/blob/main/text_encoders/clip_l.safetensorshttps://huggingface.co/Comfy-Org/stable-diffusion-3.5-fp8/blob/main/text_encoders/clip_g.safetensorshttps://huggingface.co/Comfy-Org/stable-diffusion-3.5-fp8/blob/main/text_encoders/t5xxl_fp8_e4m3fn_scaled.safetensors
The t5xxl_fp8 is for when you system has <= 32GB of RAM. If you have 64GB or more, download this encoder for better performance: https://huggingface.co/Comfy-Org/stable-diffusion-3.5-fp8/blob/main/text_encoders/t5xxl_fp16.safetensors
Again, these may require that you are authenticated to download.
These 3 files go into the ComfyUI/models/clip directory.
Once these files are added to the ComfyUI models directory, you can use them in a workflow. We can use the example workflow included with the SD3.5L model but some of the clip filenames may need to be adjusted before we can execute the workflow. This is the example workflow file and you will need to be authenticated to download: https://huggingface.co/stabilityai/stable-diffusion-3.5-large/blob/main/SD3.5L_example_workflow.json
Open the workflows menu with the
You can attempt to test things at this point by loading the workflow and then pressing the “queue” button at the bottom of the page. If the clip nodes turn red, try pressing the arrows to select the 3 filenames that we downloaded. The example workflow may not have the same t5xxl clip selected by default that you are using for example.

Hopefully the workflow can execute and you can see a generated image in the preview node.
Now that ComfyUI is running and we have a workflow, open-webui can be configured to talk with the ComfyUI server and execute your workflow remotely and present the generated image into the open-webui console.
If you are running open-webui with docker, the run command can be altered to enable image generation and point to your ComfyUI server. This is assuming that ComfyUI is running on the docker host system network.
docker run -d -p 8080:8080 \
    --add-host=host.docker.internal:host-gateway \
    -e COMFYUI_BASE_URL=http://host.docker.internal:8188/ \
    -e ENABLE_IMAGE_GENERATION=True \
    -v open-webui:/app/backend/data \
    --name open-webui \
    --restart always \
    ghcr.io/open-webui/open-webui:main
I run open-webui with Podman and I am running ComfyUI directly on the system so it can use the Nvidia GPU. Here is my podman command to create an open webui pod:
podman create -p 8000:8080 \
    --network=pasta:-T,11434 \
    --add-host=ollama.local:127.0.0.1 \
    --add-host=comfy.local:127.0.0.1 \
    --env 'OLLAMA_BASE_URL=http://ollama.local:11434' \
    --env 'ENABLE_IMAGE_GENERATION=true' \
    --env 'IMAGE_GENERATION_ENGINE=comfyui' \
    --env 'COMFYUI_BASE_URL=http://comfy.local:8188 \
    --env 'ANONYMIZED_TELEMETRY=False' \
    -v open-webui:/app/backend/data \
    --name open-webui \
    ghcr.io/open-webui/open-webui:main
There may be changes to the open webui interface where you can configure the default comfy workflow so check out the open webui documentation for verifying this “last mile” of config.
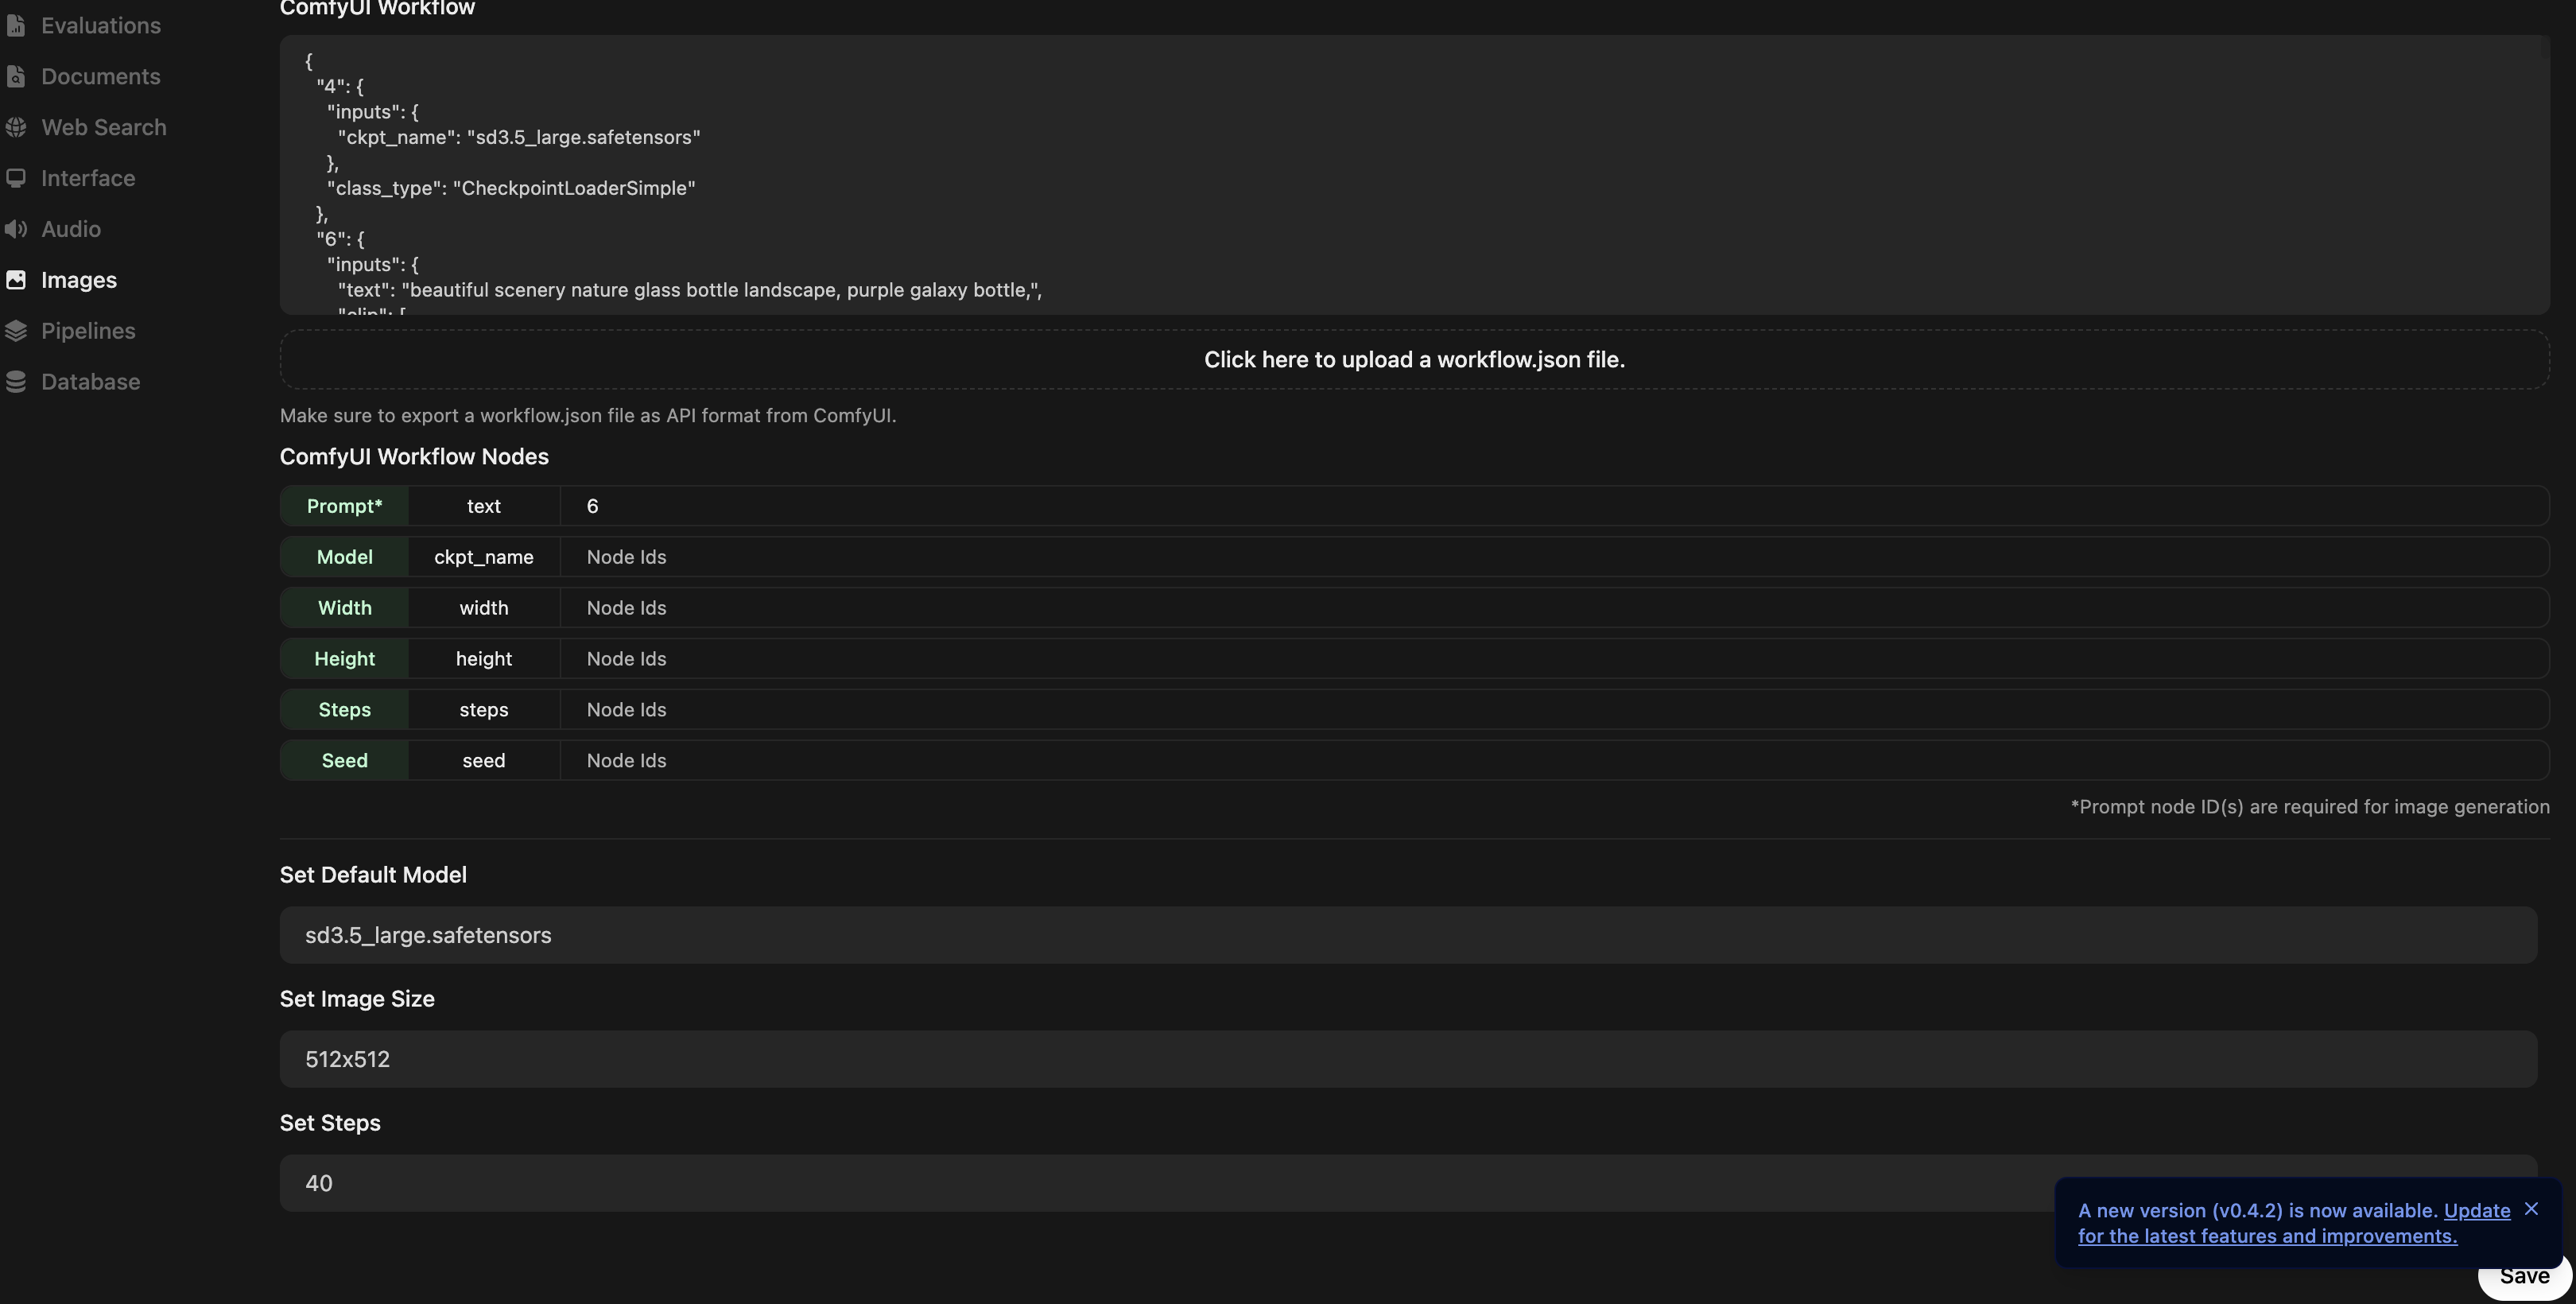
Open the /admin/settings page in open webui interface and navigate to “settings” -> “Images”
We should see image generation toggled on via the environment variable. From here we can import our ComfyUI workflow .json file. I got it to work by just specifying the node “id” (number you see in the comfyui) for the “Prompt”. It was 6 for me, I’m not sure if it will be the same for you. This menu also allows you to select a default model. The drop down should show any files that you have in ComfyUI/models/checkpoints.

Here is where I got a bit confused so hopefully this tip helps. The way I got open webui to generate an image was by first asking an Ollama model to:
Give me a prompt to generate an image with stable diffusion of a majestic castle on top of a snowy mountain
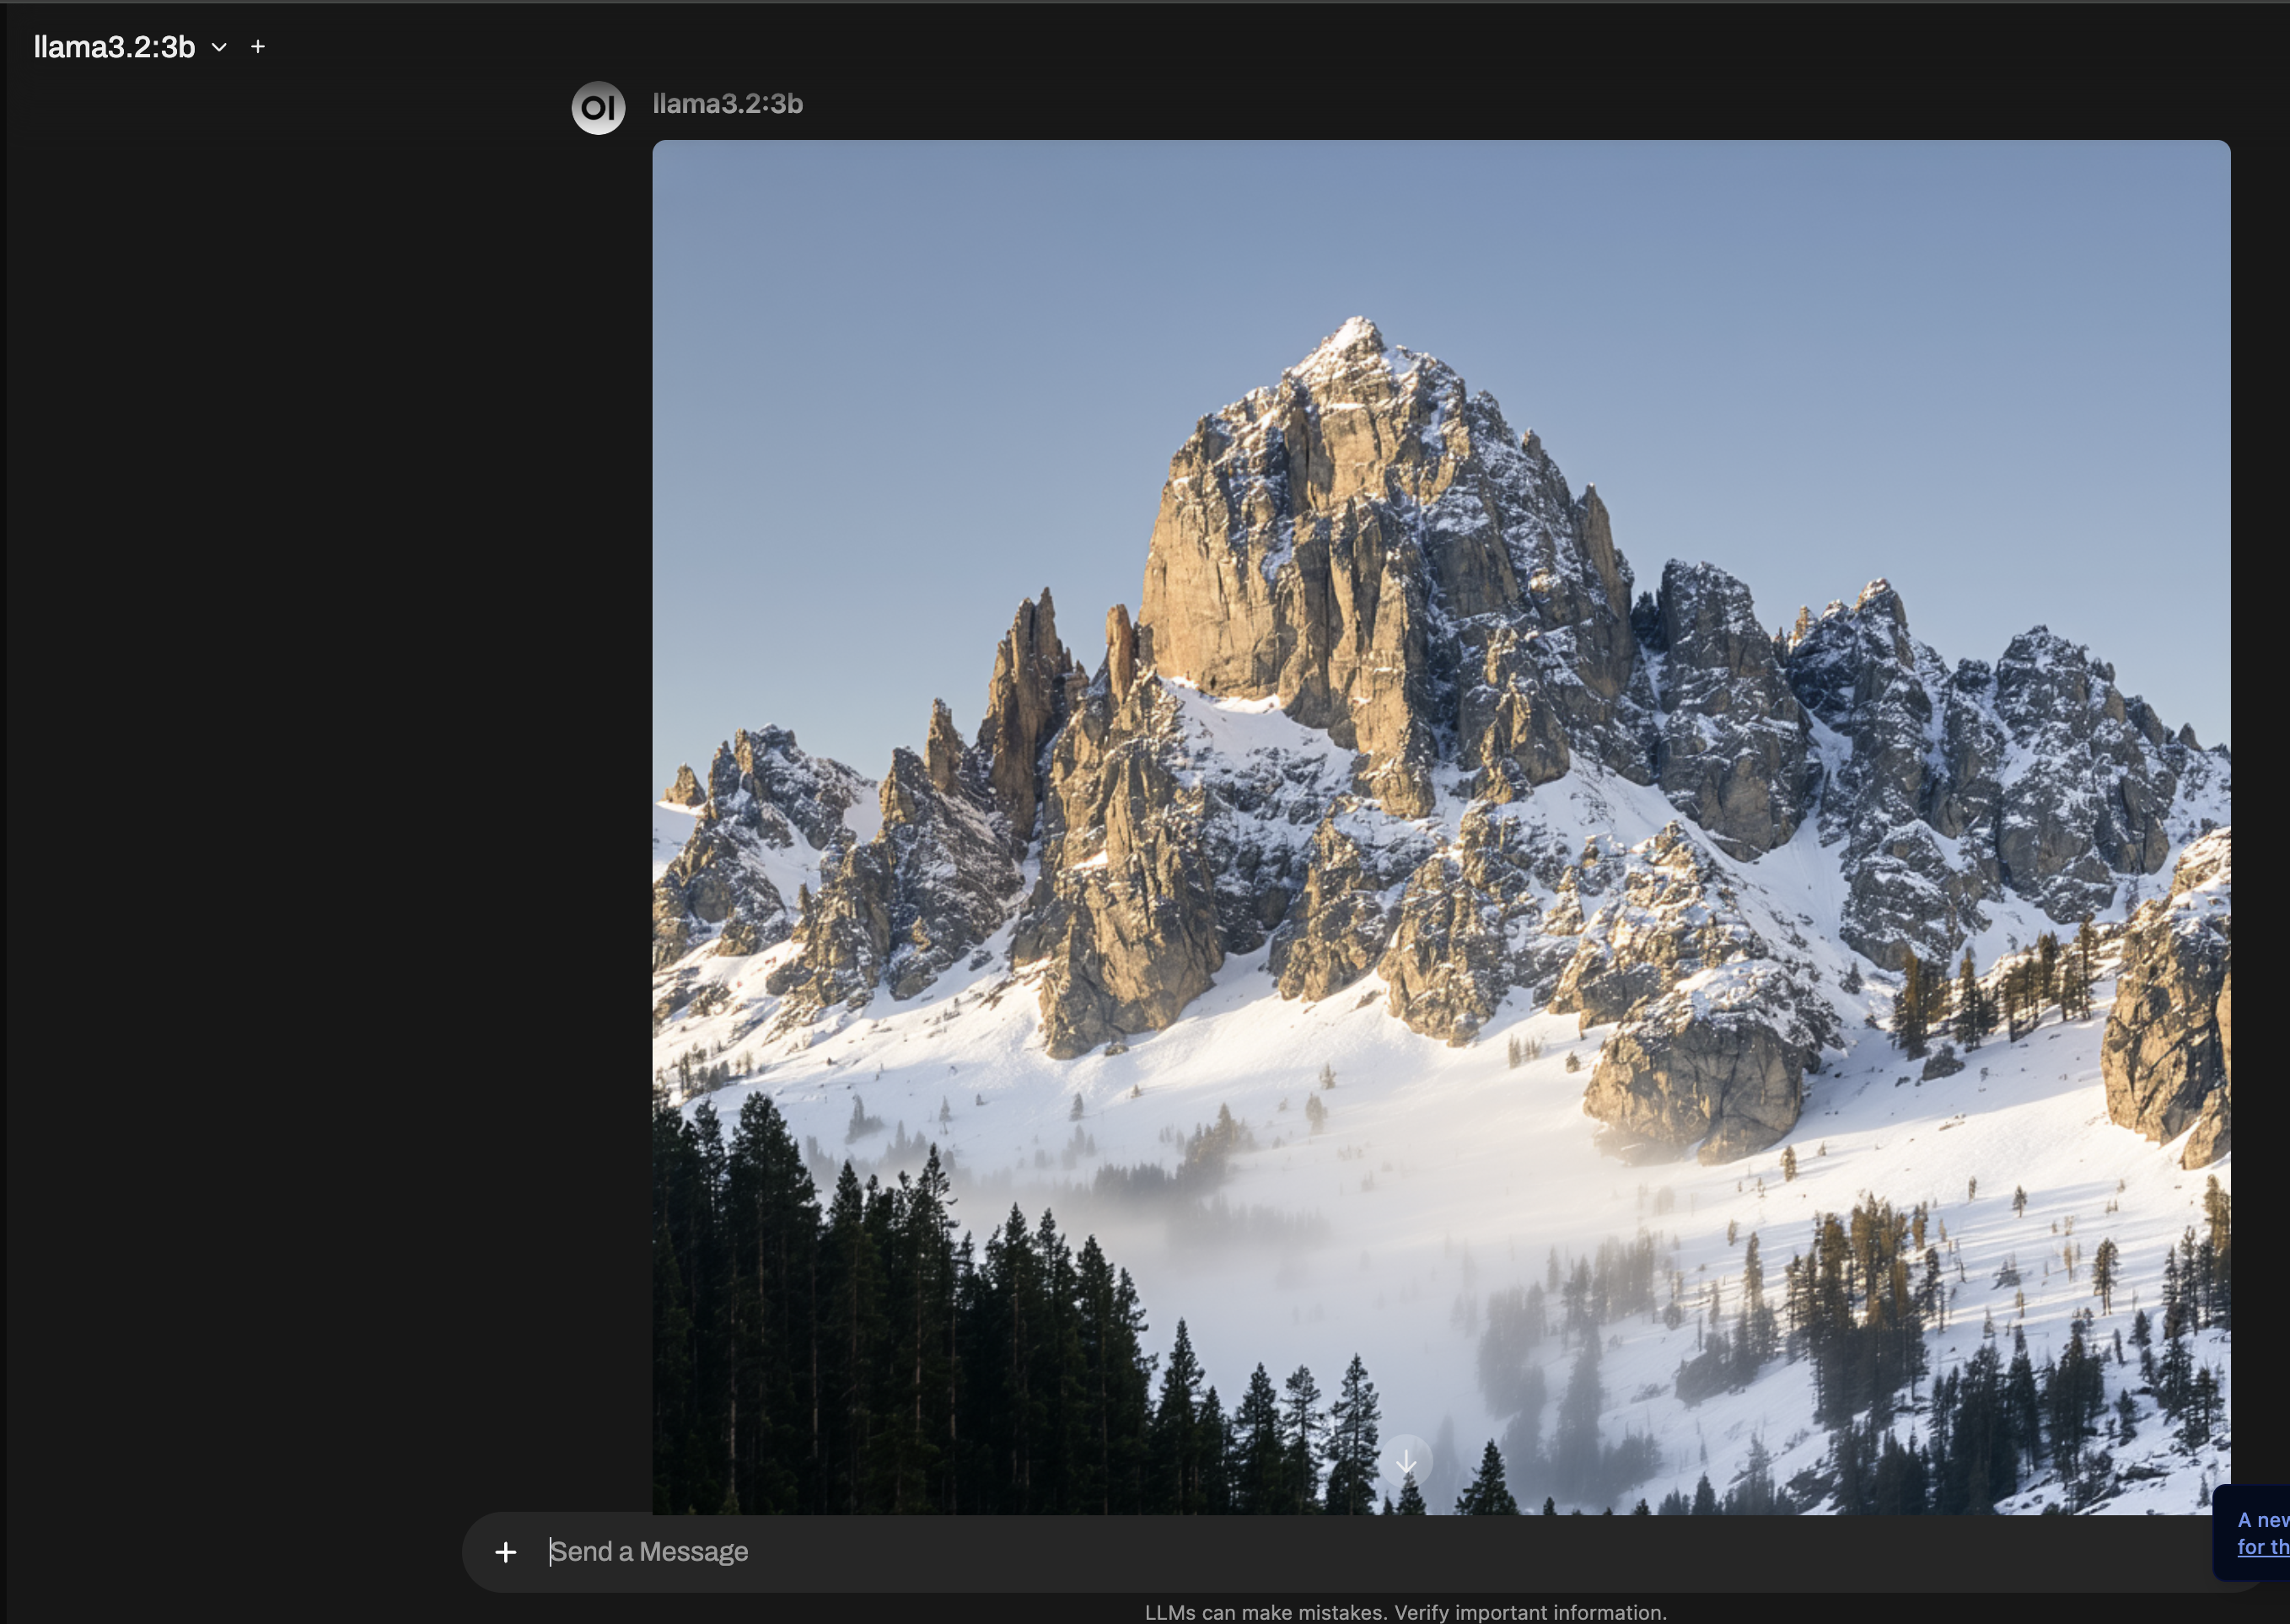
And it gave me a prompt but it also explained some things. However this extra text that explains the prompt will confuse the image generation model. The fastest way I found to generate an image is to hit the pencil to edit the Ollama prompt to only include the actual prompt for image generation. After you save the change, there is a little image button below the prompt. If you press that it will try and run the ComfyUI workflow and show the image that is generated.


Next steps
There are people sharing AI models every day. Check out websites like huggingface and civitai for more models and more workflows.
If you want to run ComfyUI as a background service on Linux, I recommend using a systemd service.
Systemd service
Create a helper script to start ComfyUI with the right parameters:
Create this file on your system: service.sh and create it near the ComfyUI main executable file on your system.
#!/usr/bin/env bash
source /path/to/venv/bin/activate
python main.py --listen 0.0.0.0
Create this file on your system: /lib/systemd/system/comfy.service
Replace the WorkingDirectory and ExecStart values with the location of the exporter on your system. Also replace with the appropriate User name.
[Unit]
Description=ComfyUI
After=network.target
[Service]
Type=simple
User=ubuntu
WorkingDirectory=/home/ubuntu/ComfyUI
ExecStart=/home/ubuntu/ComfyUI/service.sh
Restart=on-failure
[Install]
WantedBy=multi-user.target
Create this service:
sudo systemctl daemon-reload

sudo systemctl enable --now comfy.service
And you can check the status of the service:
sudo systemctl status comfy.service