Getting Started with Virtual Machines
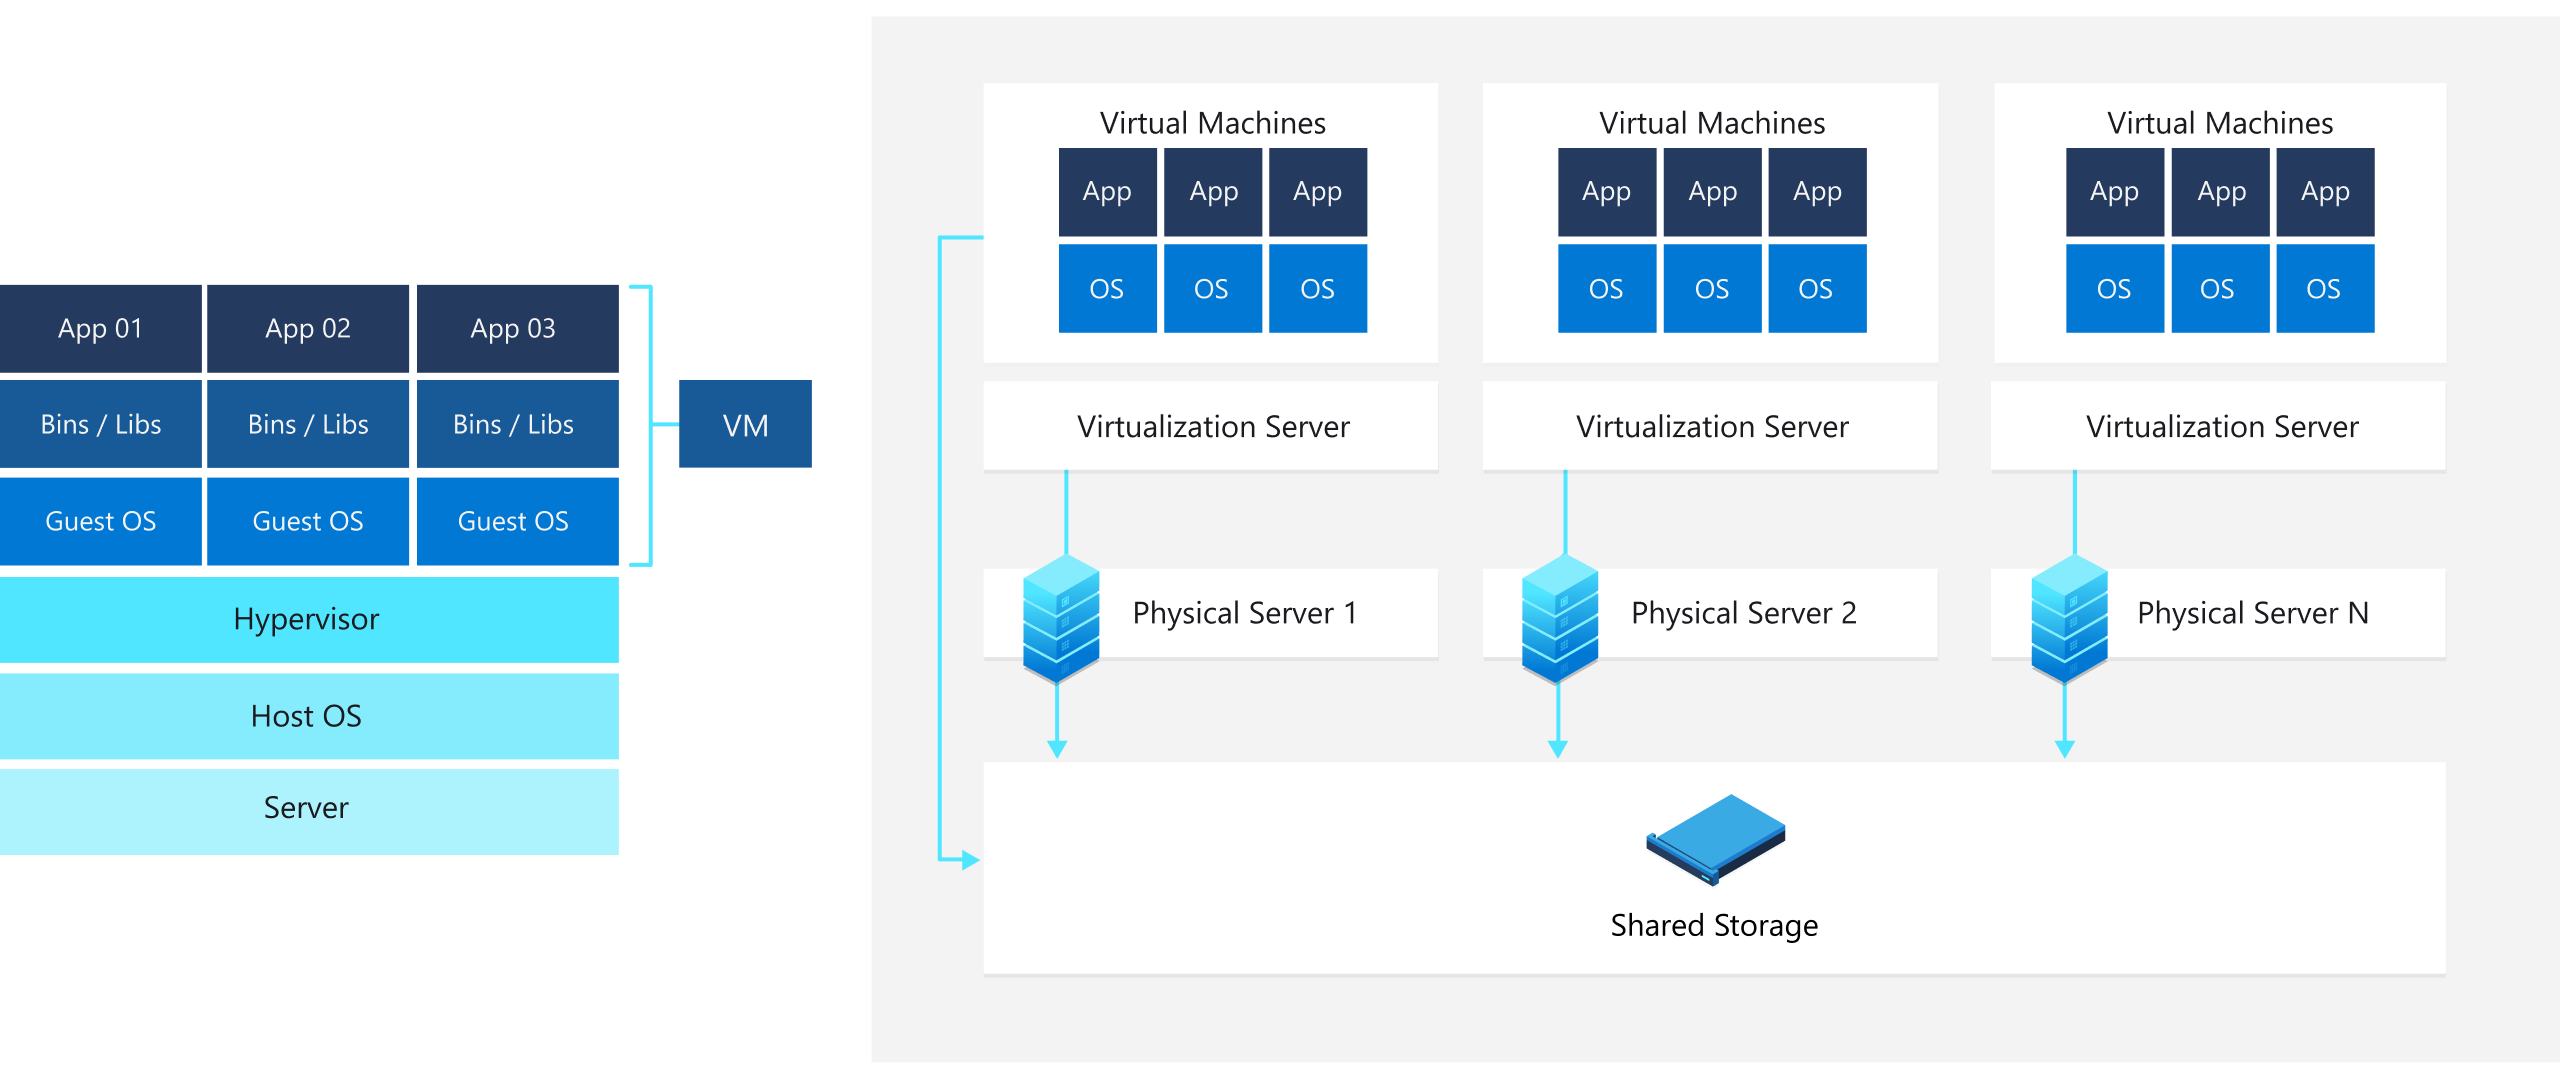
A virtual machine is like a physical computer such as a laptop or desktop or server. It has a CPU, memory, disks, and can be connected to the internet but all of these components are emulated with software and borrowed from a host computer. A virtual machine exists as files on a host computer, commonly referred to as an image. Virtual machines should not interfere with the operations of the host computer’s operating system.
What is the purpose of virtual machines?
- Testing out new operating systems or new versions of existing operating systems.
- Creating fresh environments for testing new software code.
- Backing up your computer.
- Inspecting a piece of software for malware without damaging your computer.
- Running software that is not compatible with your operating system.
VirtualBox
To create a virtual machine, you need a CPU that supports virtualization and hypervisor software to emulate computer hardware within software. I recommend starting with VirtualBox since this is an open-source hypervisor that you can install on Windows, macOS, or Linux.
Windows install VBox
On my Windows PC, I have already installed VirtualBox with Chocolatey. If you would like to know how to install VirtualBox or other Windows software easily, check out my previous post on setting up a Windows system. With Chocolatey, you can have VirtualBox running with one PowerShell command in an admin prompt:
choco install virtualbox
macOS install VBox
On macOS, I use homebrew to install and update software. I can install VirtualBox with one command:
brew cask install virtualbox
Linux install VBox
Oracle offers different package repositories depending on your Linux distribution. You can also directly download a package directly from Oracle.
See: https://virtualbox.org/wiki/Linux_Downloads
MX Linux VM
Let’s test out VirtualBox by trying out a Linux distribution that is easy to use with minimal setup: MX Linux
Download the latest version of MX Linux from a mirror close to you and then open VirtualBox and select “New”.
This will open a wizard to create a new virtual machine.
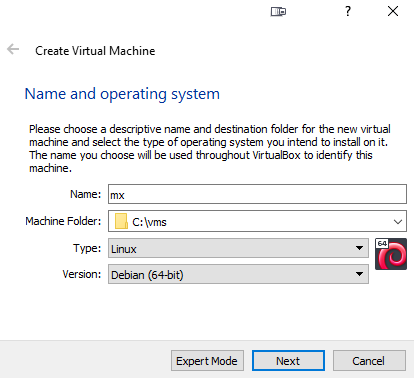
- Name it something,
- Choose the folder where you want to stash this virtual machine,
- Change the dropdown “Type” to “Linux” and “version” to “Debian (64-bit)”,
- if you can spare the memory on your PC, set this to 4096 MB,
- Create a virtual hard disk now. This can be left as default “VDI”.
- If you are short on space, select “Dynamically allocated” but it is better to select “fixed size”,
- Choose the location and size of the virtual machine disk file. To try out some Linux software, try 30 GB,
- Now, navigate to the Storage section of the VM and click on the [Optical Drive],
- Select the MX Linux .iso file that was downloaded earlier

And now you are ready to hit “Start” and have created a virtual machine.

From here hit the ENTER key and you will be brought into a Linux desktop with some software already installed. Right now the operating system is loaded into memory so any changes made will not persist on reboot. If you would like to install MX Linux, select the “Installer” icon on the desktop to install this distribution to your virtual machine hard disk. Your host computer will remain unaffected.
Cleaning up
You can delete this vm and the virtual disk by right clicking on the vm in the lefthand bar and select “Remove…”
In the popup window, select “Delete all files” to remove everything including the vm disk.