Setting up a Raspberry Pi with Ubuntu Linux
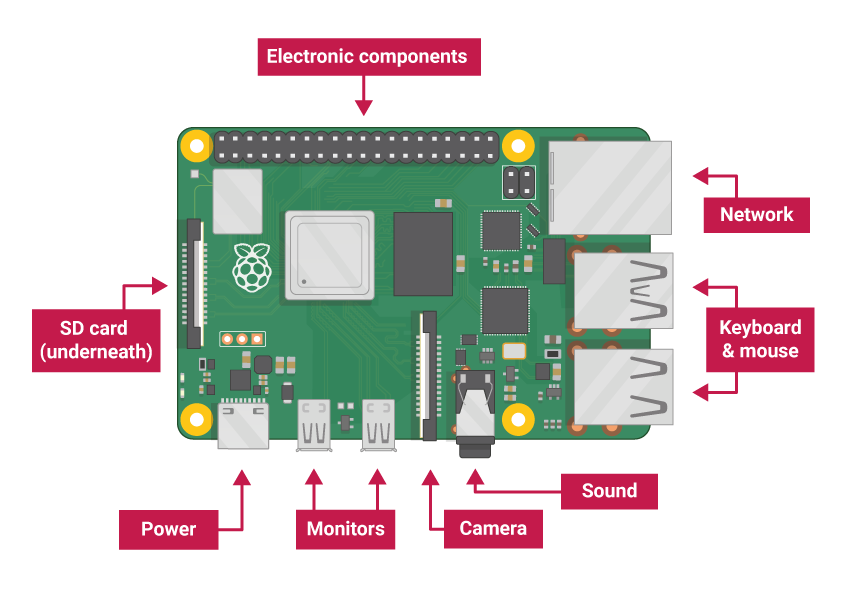
A Raspberry Pi (not pie) is a single-board computer developed in the UK by the Raspberry Pi foundation and Broadcom. The Pi was designed to promote basic computer science education around the world with a low cost computer that is accessible to developing nations. The Pi has been very popular world wide far beyond the original scope of the first product released. The newest single-board unit as of this post is the Raspberry Pi 4 Model B which contains a 64 bit processor, 1,2,4,or 8 GB of memory, 1 Gigabit Ethernet network interface, 2x USB 2 type A ports, 2x USB 3 type A ports, 2x micro HDMI ports, USB type C for power, 3.5mm A/V analog input, Wi-Fi and GPIO pins to connect non-standard devices.
One of the first posts on this site mentions the Raspberry Pi and using it as a network-wide ad-blocker and later how to use the Pi as a reverse proxy server. This post will take a step back and focus on how to set up a Raspberry Pi as well as how to get started using Linux in general.
Setup
Requirements
- a microSD card > 8GB capacity
- a computer with a SD/microSD card reader connected
- a Raspberry Pi 2, 3, or 4
- a microUSB power cable for Pi 2 & 3 OR a USB type C power cable for Pi 4
- an ethernet cable for network connectivity or a Wi-Fi network
If using this with a desktop environment with keyboard and mouse, an HDMI cable for Pi 2 & 3 is required to connect a display while a micro HDMI cable is required for the Pi 4.
Installing Linux
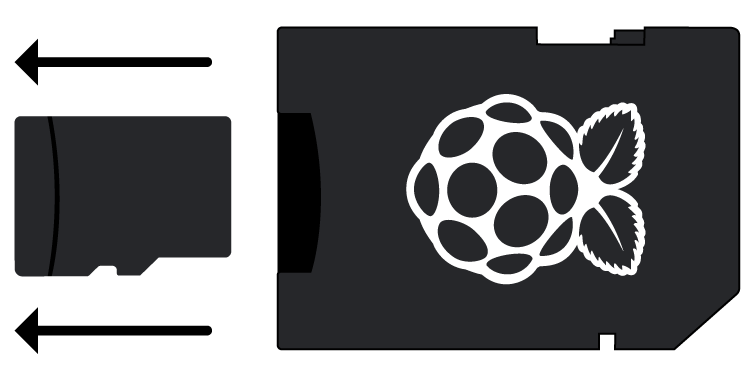
The Pi has a microSD card slot that can be used to store your operating system and files. Since the card is easy to remove, we will install Linux onto the SD card from another system. If your computer has a slot for microSD or SD cards, insert a suitable card or adapter and proceed. Otherwise, connect a usb SD card reader to the computer.
This procedure will include download and installation of Ubuntu Linux.
Raspberry Pi Imager
The Raspberry Pi foundation provides a tool for installing a Linux operating system onto a connected SD card. This application is available on Ubuntu Linux, macOS, and Windows.
https://www.raspberrypi.com/software/
If you are using Windows, download the Raspberry Pi imager. Once this is downloaded, launch the file to install the imager. After the install completes, press the windows key and search for imager to open the new app.
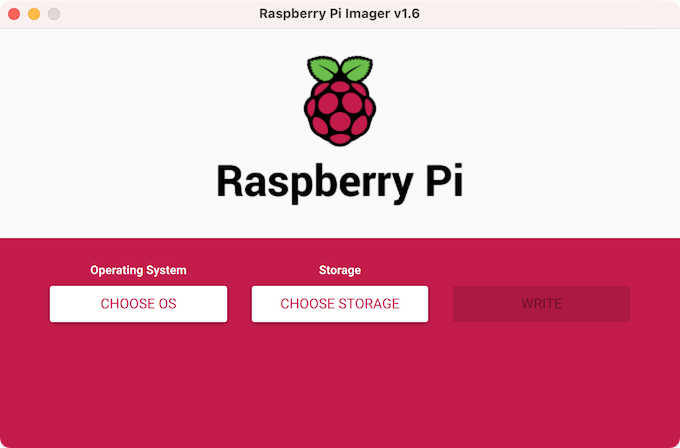
- In the Raspberry Pi imager, select Operating System and choose Ubuntu Server and select the recommended version.
- In the Raspberry Pi imager, select SD Card and choose the device that matches the capacity of the SD card you inserted.
- In the Raspberry Pi imager, select Write and the SD card will be formatted with Ubuntu Linux.
Manual install from macOS or Linux
Download the appropriate distribution of Ubuntu Linux:
https://ubuntu.com/download/raspberry-pi
Download the Ubuntu Server Recommended release and you should have a file similar to this:
ubuntu-20.04.3-preinstalled-server-arm64+raspi.img.xzExtract the .img file:
xz --decompress ubuntu-20.04.3-preinstalled-server-arm64+raspi.img.xzLinux procedure
On Linux, you can use standard command line tools to prepare an sd card with an image.
Run the command:
lsblk -pThe microSD card will be listed as something like /dev/mmcblk0 or /dev/sdb
If any partitions have been mounted on the SD card, unmount them all with umount
umount /dev/sdb1Copy the image to the SD card
Make sure the of= statement matches the sd card device or you could incur severe data loss on another disk drive.
sudo dd if=ubuntu-20.04.3-preinstalled-server-arm64+raspi.img of=/dev/sdb bs=4M conv=fsyncIf bs=4M does not work, adjust to bs=1M but this will take a lot longer to complete.
macOS procedure
Insert the SD card in the slot, or connect the SD card reader with the SD card inside, and run diskutil list
Look for a /dev/disk that is (external, physical) and looks to be similar in capacity to what was reported by the manufacturer.
If any partitions have been mounted on the SD card, unmount them all with diskutil unmountDisk /dev/disk2
Copy the image to the SD card
⚠️ Make sure the of= statement matches the sd card device or you could incur severe data loss on another disk drive.
sudo dd if=ubuntu-20.04.3-preinstalled-server-arm64+raspi.img of=/dev/rdisk2 bs=4M; syncReplace 2 with the disk number from diskutil list
You can check on the progress with CTRL + T
Once this command completes, eject the SD card
sudo diskutil eject /dev/rdisk2Troubleshooting
If the command returns:
dd: /dev/rdiskN: Operation not permittedgo to System Preferences -> Security & Privacy -> Privacy -> Files and Folders -> Give Removable Volumes access to Terminal.
Configuring network connectivity
If you want the Pi to be connected to the internet and do not care about accessing the Pi remotely, simply connect an ethernet cable and Linux will use DHCP to obtain an IP address from your router automatically.
Wi-Fi setup
If using Ubuntu Linux and you want to configure wi-fi on the Pi, mount the sd card partition system-boot after installing Ubuntu Linux and open the text file network-config
There is a commented example of wi-fi configuration, update with your network name and password.
wifis:
  wlan0:
    dhcp4: true
    optional: true
    access-points:
      'mywifinetwork':
password: 'wifi password'- During the first boot, your Raspberry Pi will try to connect to this network. It will fail the first time around. Simply reboot sudo reboot and it will work.
Static IP
To set a static IP you need to replace the
dhcp4: true
line in the network-config file with lines that specify the intended IP address as well as its default gateway and DNS server. You can do this for either the eth0 or wlan0 interface (or both). It is important that you get the indenting right for this work correctly. This is a YAML file so each indentation is two spaces.
ethernets:
  eth0:
    addresses:
      - 192.168.1.25/24
    gateway4: 192.168.1.1
    nameservers:
      addresses: [192.168.1.2]
    optional: true
Unmount SD card and connect it to the Pi
Start new Pi
To power on the Pi, connect the SD card and the power cable at a minimum. Connect a keyboard, mouse and HDMI display to use the Pi as a desktop computer.
For ubuntu, the first time the Pi boots, it will perform configuration. Once everything is set up, you can log in with the default username and password:
- Username:
ubuntu - password:
ubuntu
Connect remotely
To connect to the Pi remotely you will need the IP address (or hostname) of the Pi and an SSH client to interact with the system.
If you did not set a static IP
To determine the IP address of your board, open a terminal and run the arp command:
On linux and Mac OS:
arp -na | grep -i "b8:27:eb"If this doesn’t work and you are using the latest Raspberry Pi 4, instead run:
arp -na | grep -i "dc:a6:32"On Windows:
arp -a | findstr b8-27-ebIf this doesn’t work and you are using the latest Raspberry Pi 4, instead run:
arp -a | findstr dc-a6-32This will return an output similar to:
? (xx.xx.xx.x) at b8:27:eb:yy:yy:yy [ether] on xxx0Note the x’s are the IP address of any device manufactured by Raspberry Pi connected to your local network.
Connect using SSH
On all modern operating systems, there should be an ssh client installed in your command line terminal. SSH is a network protocol that allows users to securely connect to systems with an ssh server installed and perform command line operations. You can also transfer files over an SSH connection.
Open a terminal and run the command to connect to the Pi using the IP address from the previous step. On Windows, you want to open PowerShell to use ssh.
ssh ubuntu@ip.of.raspberry.piIf you see:
Are you sure you want to continue connecting (yes/no/[fingerprint])?Type yes into the terminal and press ENTER
When prompted, enter ‘ubuntu’ as the password without quotes. (The cursor will not print the letters that you type).
The first time you log in, Ubuntu will tell you to change the password.
Remember this new password and now you can use that to connect to the Pi remotely as well as log in locally with a keyboard and mouse.
Install a desktop environment
Even if you do not have a keyboard and mouse connected to the Raspberry Pi, you can install a desktop environment and access desktop applications remotely via SSH + VNC.
Connect to the Pi using ssh or log into the Pi connected to your Monitor/TV screen.
With ubuntu Linux, you can install software with the apt command in the terminal.
Update the package database:
sudo apt updateNow install a desktop environment, there are multiple choices to use XFCE4, LXDE, GNOME, KDE, MATE.
In this example we will install lubuntu-desktop
sudo apt install lubuntu-desktopOnce this command completes, restart the Pi:
sudo reboot nowIf you are connected locally, now you should see a login screen instead of a console.
Install xrdp server to remotely access Pi desktop
You can install software to access the pi remotely with the Microsoft Remote Desktop client (or linux equivalents such as Remmina). Open a terminal and execute:
sudo apt install xrdp
sudo usermod -aG ssl-cert xrdp
sudo reboot now
For example from a Windows system, press WIN key near CTRL and ALT and type “Remote Desktop Connection” without the quotes and open the corresponding app.
In the Computer text box, enter the IP address of your Pi from earlier steps.
Press Connect and you can log into the Pi with username and password from previous steps.
Set up VNC scraping server to remotely control display
On most debian-based systems, such as Ubuntu linux used here, there is an app that will allow you to control the local display using VNC. We can leave remote access to VNC disabled and only allow connections locally. This means that we can use ssh to securely connect to the system and only access VNC server locally.
sudo apt install tigervnc-scraping-serverNow the local display can be controlled through the vnc : 0 display.
Execute:
x0vncserver -display :0It will ask you to enter a password and optionally a view-only password. The view-only will not be able to interact with the computer, just view the display.
Connect to VNC server with tunnel
If you are comfortable using SSH it may be preferable to connect to a VNC server over SSH instead of using a Remote desktop client. XRDP is convienient but doesn’t seem to perform well in my experience.
With ssh local port forwarding, you can connect to the VNC server on your Pi but access it with a port on your system.
Execute the command:
ssh -L 5001:localhost:5901 ubuntu@ip.of.piNote here:
-Lactivates the ssh local port forwarding5001is the local port on your systemlocalhost:5901is the remote VNC server of your pi and the display number to connect to.5901is the default for the first display.ubuntu@ip.of.piis the username and ip of your pi that you connect to same as console SSH access.
once this command is open and running, you can connect to the VNC server with a program such as vncviewer
vncviewer localhost:5001This will connect to your local computer’s port 5001 or any other port you specify in the command above.
on macOS
In terminal enter:
open vnc://localhost:5001OR
CMD + k , and enter vnc://localhost:5001
to use built in vnc client.
on Windows
I tested the SSH port forwarding on Windows using the ssh program in a powershell window and it worked the same as using ssh on linux.
Install a vnc viewer with chocolatey, if you are not familiar with chocolatey, check out a previous post on setting up windows systems.
choco install vnc-viewerNow you can open vnc viewer app and connect to localhost:5001
Next steps
Now there should be a fully functional linux desktop that is accessible remotely as well all from the tiny Raspberry Pi single-board computer.
Check out some other posts on software that can be installed on a Ubuntu Linux system: