Homelab dashboard
Having a dashboard webpage that links to your web applications makes navigating homelab and cloud services easier. It is certainly possible to create a custom web app or web page but there is a great open-source project called Heimdall that not only serves as a homepage/dashboard but has API integrations to many applications used in a homelab. More web applications are added over time so if an app you use does not have an API integration currently, submit a request to the maintainers.
Installing and configuring heimdall with Docker
In order to run the heimdall server, I will be using a docker container inside of a virtual machine. In order to keep this post concise, please check out my previous post on docker if you are not familiar with the technology. I also have a post on setting up virtual machines and yet another post on setting up a dedicated system to run virtual machines with proxmox.
Requirements
In order to proceed, you must have a suitable Linux System with docker installed. See above for posts that will help you meet these requirements.
The container image that will be used here is created by the LinuxServer.io team who keep up with regular security updates and publish images that are not affected by the rate limits of the public Docker Hub.
heimdall template
In order to preserve the configuration of the heimdall server that is running in a docker container, we can use a docker compose template. Save the following as a docker-compose.yml file in a location that you will remember and that is not readable by any user.
What I mean by that is on Linux, change the file permissions of the compose file:
chmod 0600 docker-compose.yml---
version: '2.1'
services:
heimdall:
image: lscr.io/linuxserver/heimdall
container_name: heimdall
environment:
- PUID=1000
- PGID=1000
- TZ=America/New_York # Replace with your timezone
volumes:
- heimdall_config:/config
ports:
- 80:80
- 443:443 #optional
restart: unless-stopped
volumes:
heimdall_config: {}Once this template has been saved, the heimdall server can be started with the following command:
docker compose up -dUpgrading to new versions
Run these commands in the directory with the docker-compose.yml template:
docker compose pull
docker compose up -d
Proxy
A way to route traffic to Heimdall and use multiple web applications behind a single ip address is to use a reverse proxy.
For more information on how to set up a reverse proxy server, see a previous post.
Configuration
Heimdall can be configured by navigating to the hostname or IP address of the system with docker. http://docker-host.or.ip/items/create
Now you can add the first link. If you are using proxmox after following a previous post, enter “Proxmox” as the Application Name and you should see a tooltip appear, press the down arrow key and enter (or click the tooltip) and more fields should appear and the Proxmox icon will be populated. Enter the URL of your proxmox server and press “SAVE” in either the top or bottom of the menu.
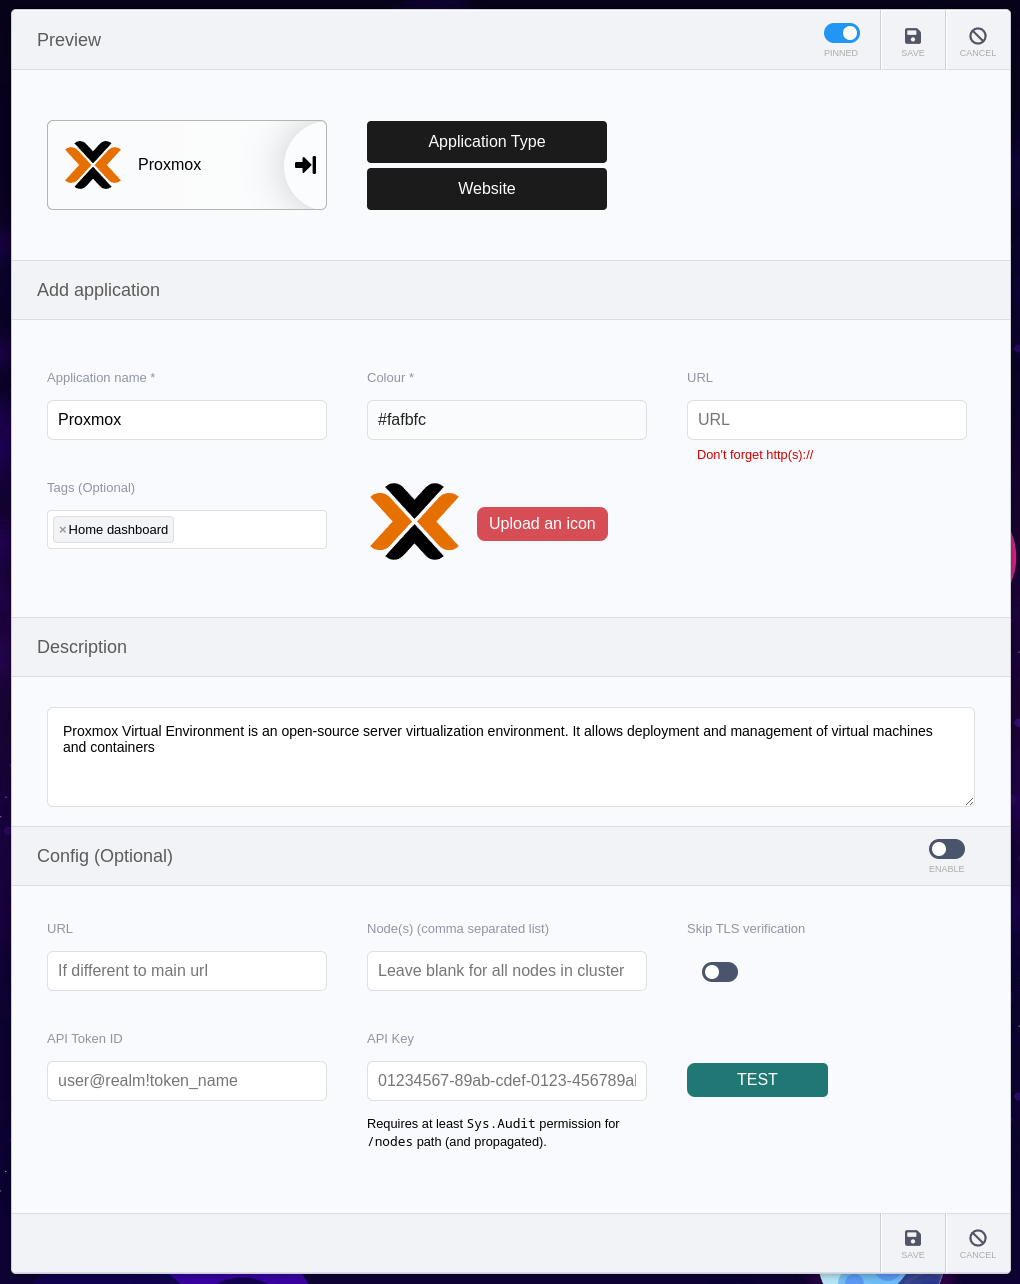
Some apps like Proxmox require an API authentication token in order for heimdall to show enhanced information. The proxmox documentation includes an example of how to create an API token for monitoring that will not have access to edit or delete resources.
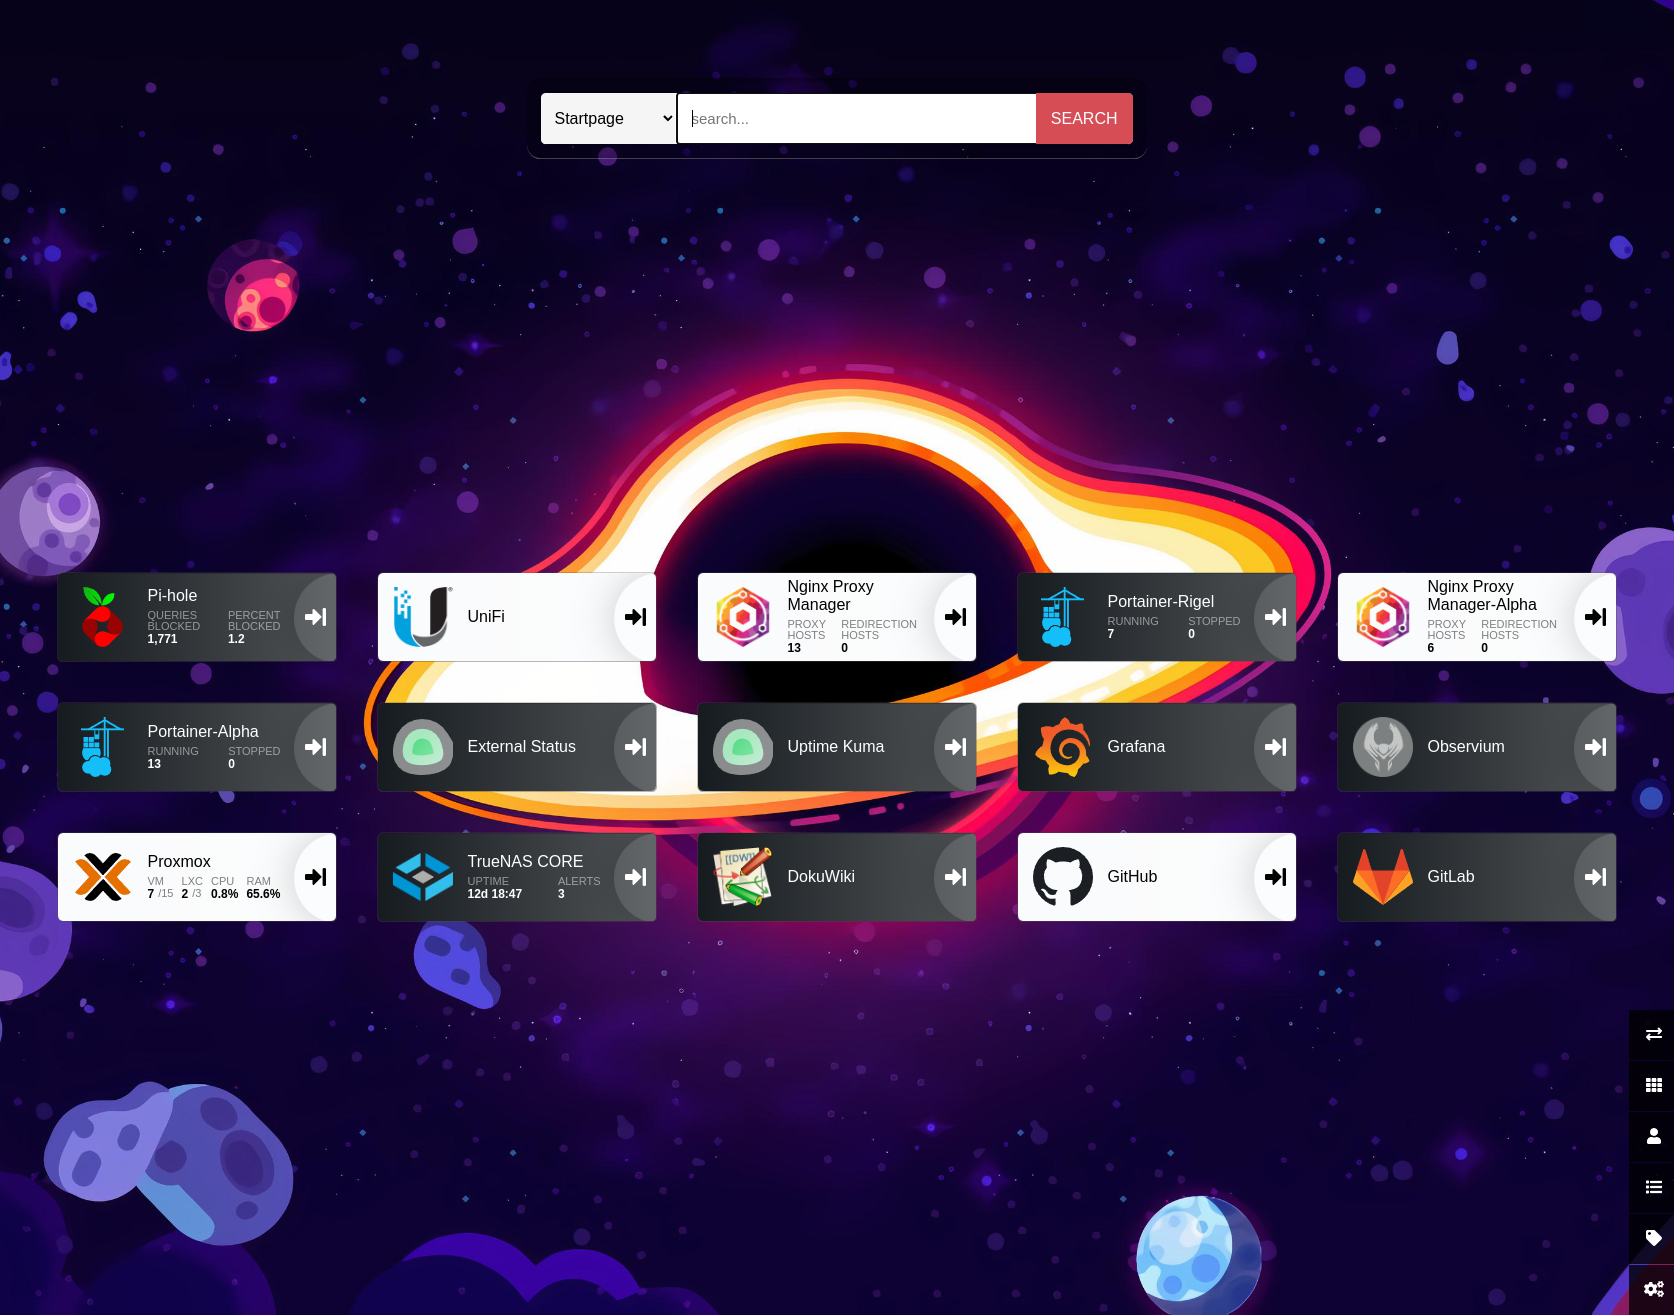
The /settings menu also allows you to enable a search engine for your dashboard and upload a custom background image. Once you add a bunch of apps your dashboard can look similar to this: