Kanboard
Kanboard is an open source software for managing projects. I am using it to track my homelab tasks and jot down ideas for later.
A kanban board is a tool that is used in agile software development. Using a tool like this can help practice for larger scale software projects.
Installing and configuring Kanboard with Docker
In order to run the Kanboard server, I will be using a container inside of a virtual machine. In order to keep this post concise, please check out my previous post on docker if you are not familiar with the technology. I also have a post on setting up virtual machines and yet another post onsetting up a dedicated system to run virtual machines with proxmox.
Requirements
In order to proceed, you must have a suitable Linux System with docker installed. See above for posts that will help you meet these requirements. There are alternative ways to run containers without docker. Check out a previous post to see some alternatives to docker.
Kanboard template
In order to preserve the configuration of the Kanboard server that is running in a docker container, we can use a docker-compose template. Save the following as a docker-compose.yml file in a location that you will remember and that is not readable by all user.
version: '2'
services:
  kanboard:
    image: docker.io/kanboard/kanboard:latest
    ports:
      - '8080:80' # Will listen on port 8080 on your machine
    restart: unless-stopped
    volumes:
      - kanboard_data:/var/www/app/data
      - kanboard_plugins:/var/www/app/plugins
      - kanboard_ssl:/etc/nginx/ssl
volumes:
  kanboard_data:
  kanboard_plugins:
  kanboard_ssl:
Once this template has been saved, the server can be started with the following command:
docker compose up -dUpgrading to new versions
Run these commands in the directory with the docker-compose.yml template:
docker compose pull
docker compose up -d
Next Steps
By default, kanboard will create a sqlite database. Using a database engine such as mysql or postgresql with kanboard will provide a more resilient backend for your application. Especially if you want to use this program long term, you will want to use a database engine and set up regular backups for the database.
Here is another example of deploying Kanboard with docker compose but adding another container to run a database for kanboard.
docker-compose.yml
version: '2'
services:
  kanboard:
    image: docker.io/kanboard/kanboard:latest
    ports:
      - '8080:80' # Will listen on port 8080 on your machine
    environment:
      DATABASE_URL: mysql://kanboard:kanboard-password@mariadb/kanboard
    restart: unless-stopped
    volumes:
      - kanboard_data:/var/www/app/data
      - kanboard_plugins:/var/www/app/plugins
      - kanboard_ssl:/etc/nginx/ssl
  mariadb:
    image: docker.io/mariadb:latest
    command: --default-authentication-plugin=mysql_native_password
    environment:
      MYSQL_ROOT_PASSWORD: secret
      MYSQL_DATABASE: kanboard
      MYSQL_USER: kanboard
      MYSQL_PASSWORD: kanboard-password
    volumes:
      - db:/var/lib/mysql
volumes:
  kanboard_data:
  kanboard_plugins:
  kanboard_ssl:
  db:
As noted above, this stack can be started with the command docker compose up -d
Accessing kanboard
Once you have started the containers, you can navigate to the web app in your browser using the port specified in the docker compose configuration. The container itself for kanboard will listen on port 80 if you want to use a different solution to proxy a connection.
In the browser, visit http://localhost:8080
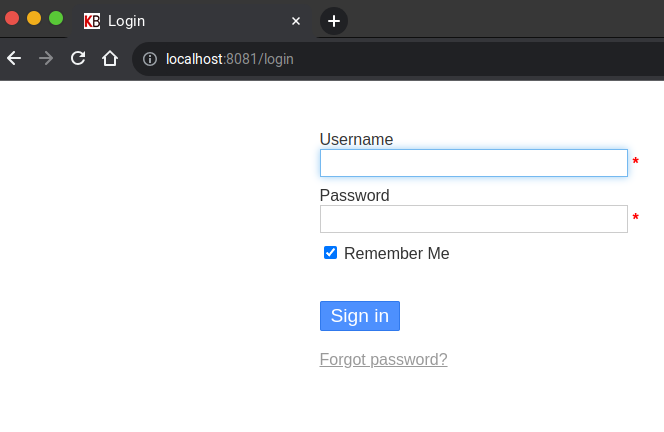
You should see a logon screen. The default username and password is admin and admin
I recommend changing this password immediately and the new password hash should be stored in the database.
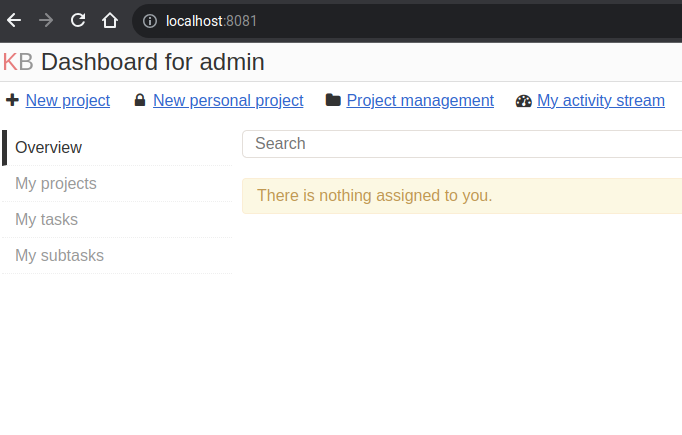
Here is the home screen after you log in
Securing kanboard
Once you are up and running, I recommend setting up HTTPS in front of kanboard whether you use the configuration available from kanboard documentation or using an external proxy server such as nginx or apache. In order to use HTTPS, you need a valid certificate file for the web server and that complexity is out of scope for what we want to look at to get kanboard running. Check out a previous post for setting up a homelab HTTPS certificate and another post to set up an nginx proxy server.
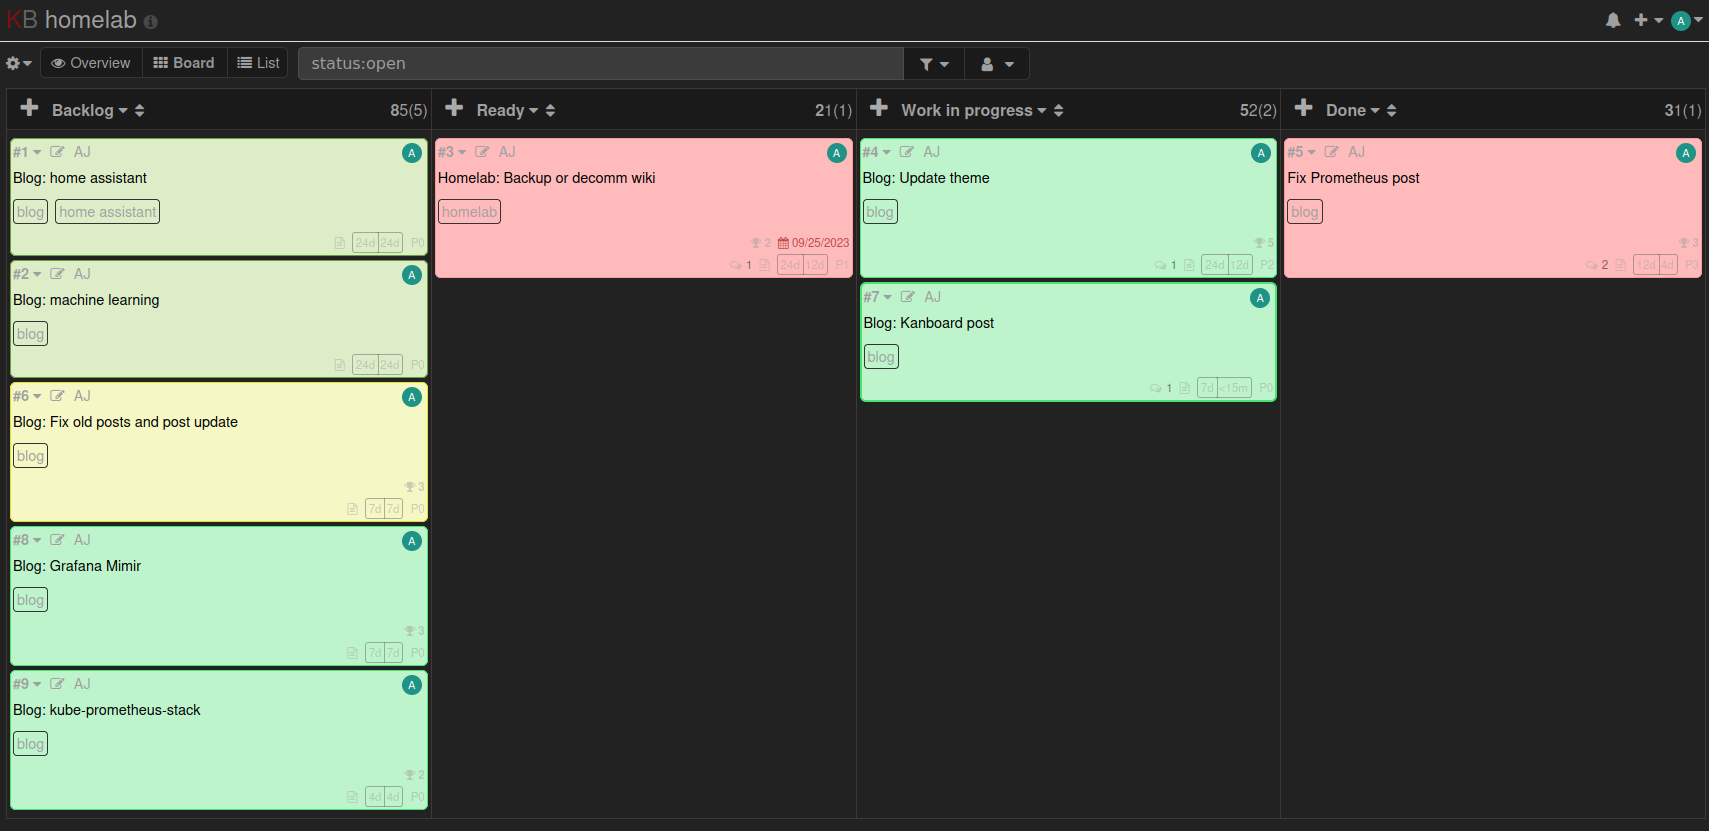
Final look
Here is a screenshot of my kanboard after creating a project, and creating issues related to that project. For more information on how to use kanboard, check out the official documentation.