Loki grafana log dashboard
Grafana Loki was introduced in a previous post. If you do not have grafana and loki, check out that post to get started. Today we will set up a grafana dashboard to explore log files that are collected by Loki. As mentioned in the previous post, logs are sent to grafana loki using an agent called promtail. This agent can securely forward logs over HTTPS so all log messages will be encrypted in transit.
Previously we looked at a promtail configuration to collect all log files in the system under the directory /var/log/. After sending those logs to loki, we can create a dashboard to explore those logs and search for keywords.
Configuring promtail agent
Promtail can be easily deployed with a docker container as demonstrated in the previous post on grafana loki. Since I am using these tools in a homelab, one of the main systems I use is Proxmox which is a debian based linux distribution. Proxmox provides a system for managing virtual machines and supports connecting multiple systems together. If you are not familiar with proxmox, check out a previous post to get started.
I do not recommend installing the docker software onto Proxmox systems and promtail can run as a single executable file on a linux system. To deploy promtail quickly to multiple linux systems, we can use ansible.
If you are not familiar with ansible, check out a previous post to get started.
This ansible role will work with debian based systems. The role will create a non-root user to run the promtail process and that user will have permission to audit .log files in /var/log/. I do not know if this will work on Red Hat linux systems, they likely require SELinux configurations to scrape log files.
Promtail ansible role
I have created an ansible role to install and configure promtail agent. This will need to target any systems where you want to collect logs.
To use this role, create a requirements.yml file to download the role from my public github repo:
- src: https://github.com/acaylor/promtail_configCreate an ansible playbook to execute this role:
---
- hosts: all
  vars:
    loki_url: 'http://your.loki.url'
  roles:
    - promtail_config
You can create an inventory file to target multiple systems. Here is an example in .ini file format:
[proxmox]
pve.example.net
pve2.example.net
pve3.example.net
[pi]
pi.example.net
To run the role:
# Install role from requirements file
ansible-galaxy install -r requirements.yml
# Run the new playbook, use inventory of desired hosts, -K is to ask for become password
ansible-playbook playbook.yml -i proxyhosts.ini -K
Create dashboard
To create this dashboard, you need a grafana installation. Check out a previous post to get started with grafana.
In previous posts, I have imported public grafana dashboards using a simple ID. Let’s import a dashboard in JSON format. I have uploaded my loki dashboard configuration to github and when this dashboard is imported, it will ask you to specify a loki datasource in order for the panels to function.
Download dashboard file
Download the dashboard file from my github
Import dashboard
Navigate to grafana select “Dashboards” => “Import” on the navigation menu or head to the url: http://your.grafana.url/dashboard/import
Select “Upload JSON file” and select the file downloaded from my github. Select your loki datasource to proceed.
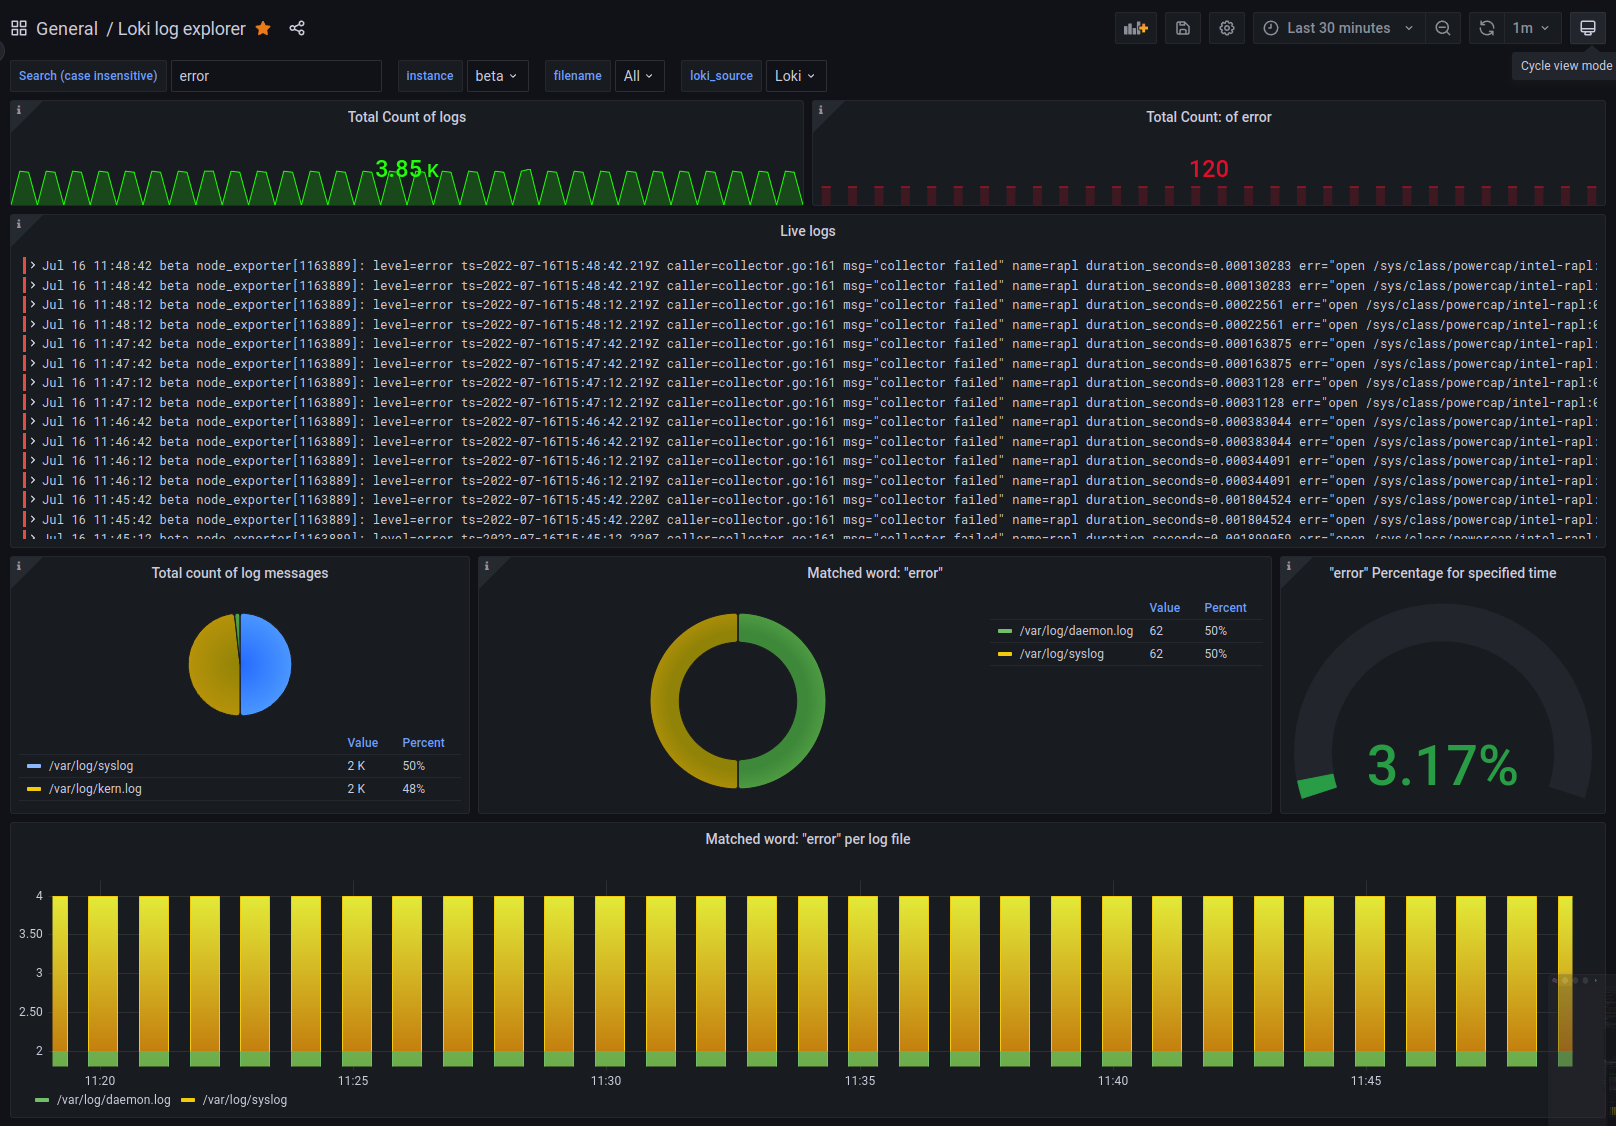
Screenshot
Here is how the dashboard should look, if you have multiple servers sending logs, the “instance” drop down will allow you to select which system you are looking at.