Terraform Google Kubernetes Engine
Terraform is perfect for managing resources in public cloud providers. If you are not familiar with terraform, check out a previous post about terraform in my homelab. I am doing spring cleaning right now, I want to move my public cloud resources from Amazon Web Services to Google Cloud Platform.
GCP allows for your VPC (your private network) to span any region in the world. AWS requires VPC networks to exist in certain geographic areas. The only things I use in the cloud are DNS and web applications, everything else is on my homelab hardware. GCP will be a bit less expensive to run my containers and the networking setup is less complex.
Terraform can be used to manage my entire GCP environment. It can also continue to manage my DNS records which for now are still managed with the AWS route53 service. I don’t yet know if this mixed environment will work for me but route53 is also how I generate TLS certificates for my homelab.
Configure GCP provider
Before creating GCP resources with terraform, you need a google cloud account, a “project”, and a “service account key”.
Terraform will use the service account key to create resources inside of the project.
If you do not have a google cloud account and would like to start using the platform, create an account at cloud.google.com, there are free usage tiers and signing up does not incur costs.
Create a project and service account
Create a new project in the google cloud console. After creating the project, if you want to continue you need to enable the Google Compute Engine which will require a billing account. I am not liable for charges that you incur if you follow along.
Create a service account
Next you need to create a service account key to allow terraform to contact the google cloud api.
- Select the project you created in the previous step in the google cloud console.
- Click “Create Service Account”
- Fill this out with information that you will remember
- Click “Create and continue”
- Select the role
Project=>Editorand the roleIAM=>Security Admin - Do not fill anything else out and click “Done”
- Select your new account in the list and navigate to the “Keys” tab
- Select “Add Key” and Create a new key “JSON” type
- Download this key to your computer and keep it safe it has access to create resources in the google cloud which will cost you money.
Configure terraform provider
Now we can configure terraform to utilize this new service account using the key that was created in the previous step.
Create a new file somewhere where you will not loose it or the gcp service account key.
terraform {
  required_providers {
    google = {
      source  = "hashicorp/google"
      version = "4.23.0"
    }
  }
}

provider "google" {
  credentials = file(var.credentials_file_path)

  project = var.project_id
  region  = var.region
  zone    = var.zone
}
Create a GKE cluster
Now I am going to create a kubernetes cluster in the google cloud to host my services.
Network
Create a file network.tf to declare the google cloud virtual network:
resource "google_compute_network" "vpc_network" {
  name                    = "gke-network"
  auto_create_subnetworks = "true"
}
IAM permissions
The GKE cluster needs a service account to interact with the google cloud api. Create a file iam.tf
resource "google_service_account" "gke_acct" {
  account_id   = "gke-account"
  display_name = "GKE Service Account"
}
resource "google_project_iam_member" "gke_acct_iam_member" {
  project = var.project_id
  count   = length(var.iam_roles_list)
  role    = var.iam_roles_list[count.index]
  member  = "serviceAccount:${google_service_account.gke_acct.email}"
}
GKE cluster
Create file to define the GKE cluster using a terraform module gke.tf:
resource "google_container_cluster" "prod" {
  name     = "gke-1"
  location = var.zone

  # The cluster will be created with one node but this will be removed to instead use
  # managed node pool
  remove_default_node_pool = true
  initial_node_count       = 1

  network = google_compute_network.vpc_network.name

}

resource "google_container_node_pool" "primary_nodes" {
  name       = "gke-node-pool"
  location   = var.zone
  cluster    = google_container_cluster.prod.name
  node_count = 3

  node_config {
    preemptible  = true
    machine_type = "e2-medium"

    service_account = google_service_account.gke_acct.email
    oauth_scopes = [
      "https://www.googleapis.com/auth/cloud-platform"
    ]
  }
}
Make sure to use a separate resource for the node pool. This allows node pools to be added and removed without recreating the cluster.
Variables
Create a variables.tf file to help you customize the resources:
variable "project_id" {
  type    = string
  default = "api"
}

variable "region" {
  type    = string
  default = "us-central1"
}

variable "zone" {
  type    = string
  default = "us-central1-c"
}
variable "iam_roles_list" {
  description = "List of IAM roles to be assigned to GKE service account"
  type        = list(string)
  default = [
    "roles/logging.logWriter",
    "roles/monitoring.metricWriter",
    "roles/monitoring.viewer",
    "roles/stackdriver.resourceMetadata.writer",
  ]
}
variable "credentials_file_path" {
  type    = string
  default = "creds.json"
}
Replace the variables with reference to your project and the JSON service account key in order for terraform to work in your GCP environment.
Outputs
Create one more terraform file to proccess some outputs. These will provide us with information like the address of the kubernetes API.
output "region" {
  value       = var.region
  description = "GCloud Region"
}

output "zone" {
  value       = var.zone
  description = "GCloud zone"
}

output "project_id" {
  value       = var.project_id
  description = "GCloud Project ID"
}

output "kubernetes_cluster_name" {
  value       = google_container_cluster.prod.name
  description = "GKE Cluster Name"
}

output "kubernetes_cluster_host" {
  value       = google_container_cluster.prod.endpoint
  description = "GKE Cluster Host"
}
Now we can use terraform to create all the resources that have been defined in the .tf files.
Run terraform fmt && terraform init && terraform validate
This will format your files, initialize the providers, and validate the syntax of your resources.
If there are no errors, continue to apply the terraform:
terraform applyEnter yes at the prompt asking if you want to add the resources and then it will take about 10 minutes to create everything.
When it is done you should see:
Apply Complete!Access new Kubernetes cluster
Once the terraform plan completes, we need a couple of tools to interact with the new cluster. First we need kubectl and if you need help setting that up, check out a previous post about getting started with kubernetes.
In order to receive a kubeconfig file to access the cluster API, you need to download the google cloud SDK.
Google cloud sdk
Windows
On windows I recommend using chocolatey which lets you install with one command.
choco install gcloudsdkIf you are not familiar with chocolatey, check out a previous post on setting up windows with this software.
macOS
If you use macOS, I recommend using homebrew
brew install --cask google-cloud-sdkLinux
On linux there are several options to install the gcloud sdk and it also will depend on your distribution. You can directly download the gcloud utility or add a repository to your system. Check out the google documentation for up to date instructions. At the time of this post I am using fedora linux. I will add the rpm repository to my system to manage the package:
sudo tee -a /etc/yum.repos.d/google-cloud-sdk.repo << EOM
[google-cloud-cli]
name=Google Cloud CLI
baseurl=https://packages.cloud.google.com/yum/repos/cloud-sdk-el8-x86_64
enabled=1
gpgcheck=1
repo_gpgcheck=0
gpgkey=https://packages.cloud.google.com/yum/doc/yum-key.gpg
       https://packages.cloud.google.com/yum/doc/rpm-package-key.gpg
EOM

sudo dnf install libxcrypt-compat.x86_64

sudo dnf install google-cloud-cli

sudo dnf install kubectl

gcloud init
Run gloud init on your platform
The last command will configure the gcloud sdk, follow the prompts and select the project created at the beginning of this post.
Gain access to the gke cluster
Now that the gcloud utility is configured, enter the following command to get access to the new cluster:
gcloud container clusters get-credentials $(terraform output -raw kubernetes_cluster_name) --region $(terraform output -raw zone)Watch for any errors but at this point you should be able to access the cluster with kubectl
Run the following to see nodes in your cluster:
kubectl get noThere should be 3 nodes, the node pool we created will provision one node in 3 different zones to maintain high availability of your applications.
Deploy an application
Now I’m going to deploy the first application for the cluster, argoCD which is an application that we can use to manage other kubernetes applications. Instead of directly applying all other applications, argoCD can monitor git repositories for changes and apply those resources in the cluster. Similar to terraform, we want all of our infrastructure and applications defined as code so we never come back later trying to wonder how something was configured and deployed.
Let’s keep the argo deployment simple:
Create a dedicated namespace so resources can be easily removed:
kubectl create namespace argocdApply the premade manifest to install argo:
kubectl apply -n argocd -f https://raw.githubusercontent.com/argoproj/argo-cd/stable/manifests/install.yamlAfter running this command, argo resources should start appearing in your cluster:
kubectl get all -n argocdOnce all pods are Ready and running, we can start using argo. There should be a service created for accessing the argo api. This service also has a web portal. This service can be exposed to the internet by changing it to type LoadBalancer or creating an Ingress but I recommend only using kubectl port-forward if you are the sole user, argo has the power to create resources in the cluster which will incur cost.
Access the argo UI
Enter the following command in a new terminal to use kubectl to forward the argo service to your machine:
kubectl port-forward svc/argocd-server -n argocd 8443:443This will proxy the argo api server to your machine on port 8443. Access the UI in the browser via https://localhost:8443 and accept the warning about a self-signed certificate. The proxy will be active until you press CTRL + C to exit the process in your terminal.
You should see the argo login prompt. You can retrieve the auto generated token to log in:
kubectl -n argocd get secret argocd-initial-admin-secret -o jsonpath="{.data.password}" | base64 -d; echoIn the argo ui or cli, the default login will be username: admin, password: output from command above.
Now let’s deploy a sample application to visualize how argo works.
Click “Create application”
Then click “Edit as YAML”
Paste the following, and if using the argo cli you can simply apply the yaml file from your system:
apiVersion: argoproj.io/v1alpha1
kind: Application
metadata:
  name: argotest
spec:
  destination:
    name: ''
    namespace: test
    server: 'https://kubernetes.default.svc'
  source:
    path: kustomize-guestbook
    repoURL: 'https://github.com/argoproj/argocd-example-apps.git'
    targetRevision: HEAD
  project: default
  syncPolicy:
    automated: null
    syncOptions:
      - CreateNamespace=true
Now click “Create” to have argo check out the example repository.
Now the app is created but I set it to manually sync, In the UI, select your new app and click “Sync”.
You should see a menu but just select “Synchronize” to complete the sync.
If using the CLI, run argo app sync argotest
Now you should see argo show the resources created by the example application:
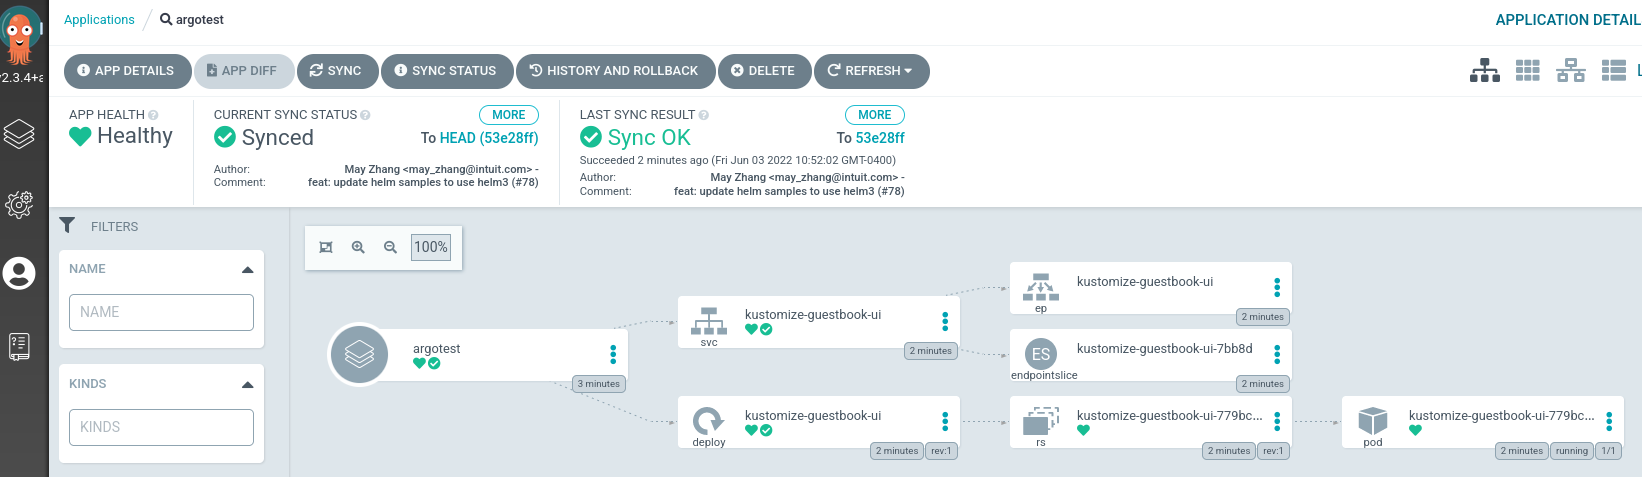
To test the app, open a new terminal and port forward the newly created service with kubectl
kubectl port-forward svc/kustomize-guestbook-ui -n argotest 8080:80This will proxy the container port 80 to your local machine port 8080. Now we can open the app in the browser http://localhost:8080
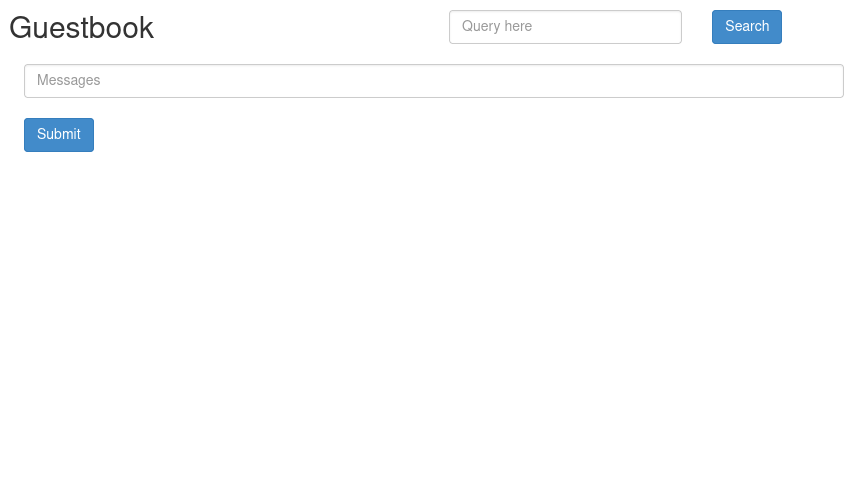
And that is a simple of example of how to deploy an application using a git repository and argocd.
Next steps
The example app contains a git repository to illustrate how you can structure your application for argo to recognize the manifests and deploy resources to your kubernetes cluster.
Argo can deploy manifests and helm charts. I will dive into more detail in future posts.
Clean up
- To clean up the argo resources, delete the app from argo and then delete the namespaces with
kubectl - To remove argo, delete the
argocdnamespace - To remove the gke cluster from your google account, run
terraform destroyin the directory with yourterraform.tfstatefile