TrueNAS for homelab storage
One of the most useful systems to set up in a homelab is shared storage. Making storage available over the network makes it easier to share files and make system backups.
A popular operating system for creating a network storage server is called TrueNAS which is based on FreeBSD and Linux and uses the OpenZFS file system. For a home lab, the BSD licensed free and public TrueNAS Core can be used in a homelab. This operating system is a stable base to set up SMB file shares for Windows clients, AFP for macOS, NFS for Linux, iSCSI for block storage, rsync daemons, and FTP servers.
Installation
Download the latest iso image from the truenas website: https://www.truenas.com/download-truenas-core/
This is a freeBSD based operating system that can be deployed onto a physical or virtual computer.
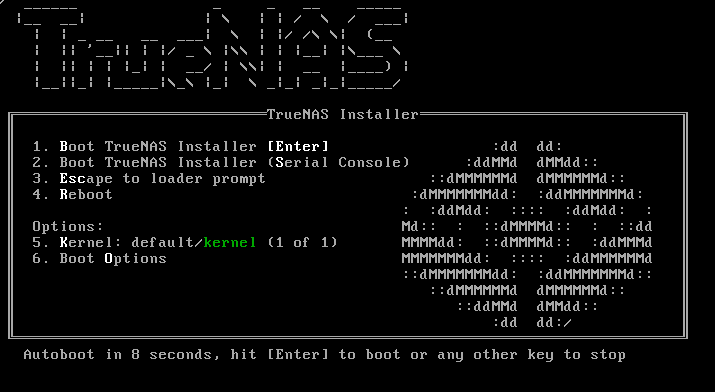
Boot the installation media and press [ ENTER ] to proceed with the installation:
Bare metal deployment
If deploying to a physical computer, prepare a bootable usb drive with the TrueNAS installation iso image. Check out a previous post on how to create a bootable USB drive.
VM deployment
If deploying to a virtual machine, ensure the VM has at LEAST 16 GB of memory. All disks used for storage must be directly passed to the virtual machine. In other words, do not create virtual disks but make sure that the VM has direct access to disk drives.
For more information on how to get started with Virtual Machines, check out a previous post.
KVM installation
Today I will be deploying TrueNAS as a VM on a Linux KVM hypervisor. That is the hypervisor used on systems with the Linux kernel. If you are not familiar with the KVM hypervisor, check out a previous post to get started.
Pass through disks to VM
With lsblk installed on the host, enter the following command to list disks and WMN identifiers:
lsblk |awk 'NR==1{print $0" DEVICE-ID(S)"}NR>1{dev=$1;printf $0" ";system("find /dev/disk/by-id -lname \"*"dev"\" -printf \" %p\"");print "";}'|grep -v -E 'part|lvm'From this output, take the mount points that match /dev/disk/by-id/ as these are not subject to change unlike the more generic labels give to block devices by the kernel such as /dev/sda
Now, edit the virtual machine configuration. This configuration file is in XML format.
virsh edit <vm_name>From inside the text editor, add new disks under the <devices> block with the key <disk>
<disk type='block' device='disk'>
  <driver name='qemu' type='raw'/>
  <source dev='/dev/disk/by-id/DISK_ID'/>
  <target dev='vdb' bus='virtio'/>
</disk>
Note that you must replace the source and target sections:
- source: this is the output from the previous commands to list the device ids
- target: this is the mount point inside the guest operating system, each one of these must be unique.
Once you exit the file and save your changes, the VM is now ready to be rebooted. Once the VM comes online, it should have the disks mounted at the locations you specify in the target configuration.
Using disks to create a storage pool
From the main navigation, select:
Storage > Pools
On this new screen, select ADD
Leave the radio button selected on “Create new Pool” and proceed.

The Pool Manager can suggest a configuration layout based on the disks that are available to the operating system. At a minimum, I suggest 2 disk drives of the same capacity used as a mirror. This provides redundancy in case one of the disks fail.
Setting up a network share
Once a storage pool is created, you can create network shares of various protocols.
NFS share
Navigate to Sharing > Unix Shares (NFS) on the left navigation menu.
From the NFS share screen, select ADD

To create a new share, select the path of the directory you would like to share in the file browser. When creating your first share, you will be prompted to enable the NFS service to start automatically if the system reboots.
That is all that is required to make a NFS share available on your network. There are more advanced configuration options on the official documentation.
Next steps
The documentation also includes instructions to configure other supported file shares such as SMB for windows. You can also configure iSCSI shares which would be used to configure a computer to boot from this storage over the network. I do not use iSCSI in the homelab currently since I have limited resources and iSCSI performs much better over a dedicated VLAN and network speeds beyond the 1 Gigabit ethernet switches that I own.
This software TrueNAS is based on FreeBSD and you can experiment with FreeBSD outside the scope of TrueNAS:
Something you may not know is that FreeBSD powers well known companies and websites. Apple’s operating systems for computers and mobile phones are based on the FreeBSD network stack, file system, and many user space components. The Sony Playstation gaming consoles are modified versions of FreeBSD.
There is also a good chance that if you use a consumer grade router/internet gateway it is based on the FreeBSD code base and you can even convert a personal computer into a router/firewall with BSD based operating systems such as OPNSense and pfSense.
Why are so many products based on BSD you ask? It has a very liberal open source license which permits individuals and corporations modify the source code without publishing their updated source code to the public. The license for Linux on the other hand requires that any modifications to the source code are made available to the public for free. While there are corporations that publish and support Linux distributions, they are required to release all of their source code. BSD allows companies to redistribute BSD based code without releasing their changes to the public.